Quantcast
Channel: Best Binocular Reviews
Viewing all 313 articles
Browse latest View live

How to use Binoculars

$
0
0

Introduction
Things that we do often or regularly become second nature and we do them without even thinking about it. It is because of this that I probably took it for granted that everyone would just know how to use binoculars and so I never really thought about writing an article for BBR about the subject.

However that all changed recently: whilst while watching a wildlife show on television, I noticed a clip where a woman lifted a pair of grimy binoculars to her eyes and held them in completely the wrong position and place.

This got me thinking that unless you have been told or shown how to do it correctly, there is no inherited or instinctive way of knowing how to use them correctly. So whilst it is simple, it is an important question to address as you want to spend as much time as possible viewing your chosen subject in the best and most stable way possible, and as little time as absolutely necessary fiddling with your binoculars trying to get it right.

Knowing your Instrument

Like learning anything new, in the beginning it can feel daunting or perhaps in this case not daunting, but just a little strange or awkward at first, depending on just how familiar you are with your binoculars.

First up, you will probably have your binoculars in some sort of carry case. This often has a shoulder strap (that may or may not be already attached) and should be just long enough to sling the case over one shoulder. Inside the bag is the binoculars and usually a small cleaning cloth (to be kept in a sealed plastic bag to keep it as clean and dirt free as possible).

Next, the binoculars. These will almost always have a neck strap, lens caps for the two objective lenses (some remain attached to the instrument even when opened – see image below), and lens caps (rain-guard) for the two eyepiece lenses that can usually be attached or threaded through your neck strap if you wish.

Objective Lenses on the Snypex Knight D-ED 8x32 Binoculars

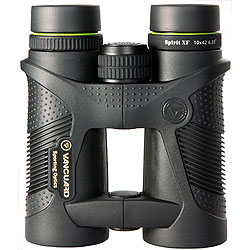
The left side barrel connects to the right one by a single or sometimes in the case of an open hinge body design, two central pivots (as with the example Snypex Knight D-ED binocular above and below). You should adjust the pivot(s) so that the two eyepieces are correctly spaced to match the distance between your eyes (this is known as the IDP or Interpupillary Distance Setting).

Starting on the right side of my binoculars in the image above, the usually (but not always) larger objective lenses are at the front (these collect the light), and the eyepiece lenses are at the rear (these are the ones you look through).

Then there is the pivot/hinges and then most often, incorporated in the center of the hinge is the focus dial/wheel (see image below). Turning this moves the mechanism in both of the eyepieces simultaneously and adjusts the focal distance.

Note: Some fixed focus binoculars will not have a central focus wheel at all.

Focus Wheel on the Snypex Knight D-ED 8x32 Binoculars

Diopter Adjustment on the Snypex Knight D-ED 8x32 BinocularsThen usually located on the right eyepiece is the diopter dial/ring (shown in image on the right) that is used for calibrating your instrument to match your particular vision (more on this later).

How to Focus Binoculars

You may wonder why I did not put this section first. Now we are familiar with where to find every part of the binoculars, it is much more easy to use them more quickly. It only takes a few steps and with a little practice you will be doing it without so much as a second thought.

The purpose of binoculars is to allow you to see a distance object more clearly by making them look larger, as if you were seeing them from much closer. This is only worthwhile if you can see the image in clear focus.

Take your binoculars out of the case, and put the neck strap on. Remove the lens caps (all four) and if not tethered to your instrument, put them safely into the case. This way, when you put binoculars away, you will know where the lens caps are! Choose a stationary object to focus on and lift the binoculars to your eyes. Bend the central pivot/hinge until it matches the distance between your eyes and you only see a single image.

Then, the first time you use your binoculars, you will want to calibrate it to match any differences in vision between your eyes:

  1. Being careful not to touch the glass, cover the right objective lens with your hand (or close your right eye), and turn the main focus dial until the image you see with your left eyes is sharp
  2. Now cover the left lens with your hand (or close your left eye) and this time instead of turning the focus wheel, turn the diopter dial instead (usually located near the right eye-piece and shown on the small image above right) until the image is sharp
  3. Finally look through the binoculars with both eyes. The image should be perfectly clear. From now on, all you need to do is turn the central focus wheel to focus on objects at different distances until the image is nice and sharp

You can find more information and a more detailed explanation on this in our guide on How to Focus Binoculars & Calibration, which also discusses different types of focus wheels and diopters.

Now we have looked at how to adjust binoculars it is worth noting that once the diopter is correctly adjusted for your eyesight only the focus dial now needs to be used, and you can keep both of your eyes open.

How to Hold Binoculars

How to hold binoculars

But how should you hold your binoculars? Does it matter? This one is mostly down to what you find most comfortable for you.

I like to hold them two-handed with both hands evenly spaced and wrapped around each barrel, I tuck my elbows in slightly to my body. This provides a fairly stable platform for me. Some people also press their thumbs against the cheekbone, which I find uncomfortable.

Also note that the grip will change a little depending on the exact size and style of your instrument, but in general this principal holds true. For example, in the image below I am only using one hand because I am taking a photo with the other, but the grip is also slightly different because these are more compact binoculars and thus your thumbs and fingers will more easily wrap around the body. Indeed if you have larger hands, you may find it easier to hold small compact bins with just the tips of your fingers rather than wrapping your hand completely around them.

Focus Wheel on the Snypex Knight D-ED 8x32 Binoculars

However, once I had written this, I did a little more research to see if others did things a little differently and came across this article written by Strathspey of Scotland that included a couple of images that illustrate (see below) how they suggest you should hold your bins.

Image Credit: Strathspey Binoculars

I personally prefer to hold my bins in the way that they deem to be the wrong way (image on the left)! However as everyone is different it may be worth just experimenting a little until you find the position that is most comfortable for you. The most important considerations to keep in mind are that you are comfortable holding them, you can keep the image nice and steady and that it is easy for you to reach and adjust the focus wheel whilst still maintaining a steady view.

Note: Some larger pairs of binoculars are best used on a tripod, as explained in this guide on Binocular Tripod Adapters.

Aiming

A technique I find invaluable, which I learned from an amateur photographer, is how to find your subject. If possible find your subject with your naked eye. While keeping looking at the subject bring the camera (or in our case binoculars) to your eye. This means your subject will already be there and lined up.

If you cannot find your subject this way, then choose something close by – but easier to find. Like the corner of a tower where a peregrine is perched. Once you have the tower in your binoculars it is fairly easy to track to where the bird is.

For more details, take a look at this BBR article on Aiming your Binoculars.

What else to consider

If you wear glasses then you may need to consider adjusting the eyecups to alow of the extra space created by the frame and lenses on them. For more, check out the BBR guide on How to use Binoculars with Glasses.

In winter, it is worth considering wearing gloves. Please make sure that you have checked that you can hold and adjust the binoculars while wearing them, as thick gloves that need to be taken off can get in the way more than they help.

The magnification of your binoculars will affect how easy it is to practice how to use your binoculars. It is easier to learn while using less powerful binoculars. If you have yet to buy your binoculars read our guide on What To Look For When Buying Binoculars.

You can learn more about differences in magnification in this guide to How a Binoculars Magnification affects Stability, Field of View & Image Brightness.

Look after your binoculars

Remember how I carefully got my binoculars out of their soft case? Once you have finished using binoculars it is worth replacing all of the lens caps, and stowing them safely in their case. This means that on your next trip you can quickly use them again with no surprises.

Between trips keep your lenses clean. The lady in the television clip should have read our guide on How to Clean Binoculars & Their Lenses.

Summary

Learning how to use binoculars and adjust them is not difficult and after a few times will become natural and you won’t even think about it.

  • Adjust the pivot (central hinge) until it matches the distance between your eyes and you only see a single image
  • Pick an object, cover the right lens, turn the focus dial until the image is sharp
  • Cover the left lens, turn the diopter until the image is sharp
  • Look through the binoculars with both eyes, the image should be perfectly sharp and from now on all you need to do is adjust the central focus wheel to get a sharp image at different distances
  • Keep you binoculars properly stowed, and look after them.

Please feel free to contact me if you have any further questions.

Share

The post How to use Binoculars appeared first on Best Binocular Reviews.


Kuiu vs Badlands Bino Harness

$
0
0

Kuiu vs Badlands Bino Harness

Depending on your requirements, the ideal/perfect bino harness for you will largely depend on your specific needs or uses and the type or size of binocular and possibly other gear that you wish to carry.

So for example, you may prize protection of your expensive bins as the most important feature, whilst others will place fitment and comfort above all else as they may need to carry heavy gear over long periods of time/distance. Then there will be others that need a simple, lightweight harness whilst.

However if you are looking for a good all-rounder that does a good job in almost all areas and also has the capacity to carry other gear like a rangefinder for example, two of the most popular full bag type harnesses currently doing the rounds at the moment come from Kuiu and Badlands:

Kuiu Bino Harness vs Badlands Bino Harness

There is no doubting that both the Kuiu vs Badlands Bino harness are great “carry bag” type chest harness systems and as such, both are included in my shortlist of the Best Binocular Harness for Hunting. But unless you plan on splashing out and buying both of them, the inevitable question will come down to which is the best for you, your specific needs or preferences and your budget.

To help answer this question I have decided to place the two side-by-side and compare their main features and specifications and discuss their relative strengths and weaknesses:

Size Considerations

I guess the most basic and first place to start is to check that each bag is not only capable of storing your binoculars, but which one potentially has the best fit for them. Then there is also the comfort factor and just how big a bag you want to carry on your chest.

The KUIU Binocular Harness is available in two sizes, a “Large” and an “XL”:
The Large is designed to accept binoculars with a maximum objective lens diameter of 42mm. So will be ideal for your commonly found and used 8x42, 10x42 binoculars. It has a weight of 7.2oz (215g) and it’s dimensions are Width: 5.5in x Depth: 3.15in x Height: 7.3in.

Whilst the XL can accept bins with up to 56mm objective lenses. So This would include your more high powered, long distance binoculars like a 16x50, or 15x56 for example. The KUIU XL weighs 8.3oz (235g) and has dimensions of 6.1in x 3.35in x 8.5in.

Badlands also have a couple of different size options. The Badlands Bino-X Binocular Harness is their largest bino case and the company says will accept most 56mm bins or smaller. Note this means it will obviously take 42mm bins, but is optimized for larger models. The reason you may decide to still opt for the larger case even if you have a 42mm bin is so that you can also carry other gear within the bag.

The Badlands Bino X has a total weight (including the straps) of 1lb (16oz / 454g) and it’s dimensions are 10in x 7.5in x 4in.

If you use a 42mm binocular, want a more lightweight and compact case, then you will be better opting for the Badlands Bino C Case and harness which in their words is Optimized for 8x42 binos. Obviously a 10x42, or any other 42mm bin will also be just fine as well.

The Badlands Bino C has what they say is the same total weight of the Bino-X of 1lb (16oz / 454g), but is far more compact: 8in x 6in x 2.5in.

Protection

Whilst there is no doubting that both the Badlands and Kuiu bino harnesses offer a far higher level of protection than if you were just to use your neck strap or even a traditional non covered harness for that matter. However there are a few small differences between each of them that are well worth keeping in mind as they may influence your decision, especially if you are looking to get the highest level of cover and protection for your instrument as possible:

Kuiu Harness
An obvious strength of the Kuiu is it’s compact, low profile and lightweight design, nevertheless there is a trade-off because you get less padding and so it does not provides as much protection to the instrument inside it than a very well padded case like those from Badlands.

On top of this, the flip top lid design is such that the cover does not completely encase and go all the way around your binocular (it is open at the rear). As this open section leaves the binocular resting against your chest, this is not a worry interns of impacts against your instrument as your body will protect them. However it does enable water and debris to get into the pouch.

This can be a real issue if you often find yourself going through thick undergrowth as not only can it make your optics become dirty, but the last thing you want is something with a rough or pointy edge getting in the bottom of the pouch and rubbing against the lenses of your binoculars.

Kuiu do offer a solution to this with an included and detachable waterproof rain cover. However it is something that you have to remember to put on before going through terrain where debris can enter and then this obviously makes it less easy to access your binos.

As for the ensuring that you don’t accidentally drop your binoculars, as they are attached to the straps there is no chance of this happening. However this system can be a little painful for those who like to swap their bins with a friend or attach them to a tripod, as you have to unclip them every time.

Badlands Bino Case
In contrast, the amount of padding that you get with either the Bino X or Bino C from Badlands is far more protective. The fact that it is also a fully covered case and snaps closed with a long strip magnet means that your binoculars are also better protected from things like rain, snow, dust and small debris.

Another difference between these and the KUIU system is that your binoculars simply sit in a pouch within the case. This means they you do not need to unclip your bins from the harness should you wish to pass over to a friend or fix them to a tripod. Note: They do have a tether located internally that you can attach to your bins to prevent the possibility of your dropping them if you want the added security.

Kuiu vs Badlands Bino Harness - Internal padding & Access

Access

In terms of how quick it is to access your optics start glassing, both are just about equal:

With the Kuiu, you simply flip over the top section that covers the eye-pieces on your bins and pull them out. It is quick as well as almost silent (unlike some cases that user Zippers).

Likewise, with the Badlands Bino X and Bino C, you flip open the front of the bag that is held closed magnetically and take out the binoculars which are kept secure in their own pouch. This is as quick and silent as the Kuiu. So I would say the honors are even in this department.

KUIU Bino Harness Shoulder Straps

KUIU Bino Harness Shoulder Straps

Comfort

In terms of carrying comfort, here again the harness part on both the Badlands cases have the edge over the KUIU, which has far thinner and completely unpadded shoulder straps.

With the Bino C you get a wider shoulder section that will distribute the weight better that which you get on the Kuiu Bino Harness:

Shoulder Padding on the Badlands Bino C Harness

Shoulder Straps & Mesh on the Badlands Bino C Harness

Then what I also like is that Badlands have recognized that your load will most likely be heavier with their larger Bino X Harness (if you are using larger bins) and as such they have beefed these shoulder sections up by adding extra padding to them:

Shoulder Padding on the Badlands Bino X Harness

Shoulder Padding on the Badlands Bino X Harness – also shows the hydration pouch

Storage, Accessories & Extras

With the Badlands Bino X, I like the Zipped closed pouch located on the rear of the harness straps where you can fit a hydration pouch (It will accept a 1 Liter water reservoir) and then run the water tube from there through hooks on the shoulder strap and have it rest in a convenient location to access.

You don’t have this option with their smaller Bino C, but what you do get is a handy hook under the bag that can be used to attach many items, but is especially designed to hang a bow from to keep your hands free whilst glassing.

Both harnesses from Badlands have quick release tethers on either side of the bag and are perfect for attaching items like rangefinders, rangefinder bags, water bottles etc. They also both have internal zipped closed pockets ideal for safely storing small items like keys, money or licences etc.

Cost

In terms of price, if you look at the recommended retail price they are pretty even, however I have seen the Badlands Bino X being sold at reduced rates which once again gives them the edge (at the time of writing – however this can of course change):

Kuiu Harness
Depending on the size you choose the Kuiu bino harness will set you back between $85 and $90 / £85 or £90:

KUIU Bino Harness in the US

KUIU Bino Harness in the UK

Badlands Harness
Both the Badlands Bino X and the Bino C are currently available for around $80:

Badlands Bino Harness in the US

Badlands Bino Harness in the UK

Videos

Below are some product videos that I find also really help in showing what each case is about and their relevant features:

KUIU Bino Harness

Badlands Bino X Harness

Badlands Bino C Harness

Summary

As I started off this article, I think both solutions are excellent and certainly amongst the very best protective binocular harnesses currently on the market. Which you go for will depend on your requirements:

Choose the:

Kuiu Bino Harness: If you want a lightweight, low profile harness that offers a good, but not great level of protection, extra carrying capacity and comfort.

Badlands Bino C Harness: If you want more protection and a little extra comfort than that which you get with the Kuiu Harness and perhaps save a few dollars.

Badlands Bino X Harness: If you want the maximum level of protection, comfort and carrying capacity, but are willing to take a hit when it comes to the size of pack that you place on your chest. It is also currently easier to get hold of and less expensive than the KUIU.

Cost & Where to Buy

Kuiu Harness
Depending on the size you choose the Kuiu bino harness will set you back between $85 and $90 / £85 or £90:

KUIU Bino Harness in the US

KUIU Bino Harness in the UK

Badlands Harness
Both the Badlands Bino X and the Bino C are currently available for around $80:

Badlands Bino Harness in the US

Badlands Bino Harness in the UK

More Information & Further reading

Share

The post Kuiu vs Badlands Bino Harness appeared first on Best Binocular Reviews.

Best High Powered Binoculars for Hunting

$
0
0

bushnell hunting binoculars

I recently had a question sent into me by someone looking for a pair of binoculars for hunting where they specifically wanted them to be of high quality, have a powerful magnification and where weight was not an issue. I thought that my reply may be of interest to others out there and so have posted it below:

Have A Question For Me?Question:

I am looking for a pair of high magnification binoculars to be used primarily for deer hunting from a blind or stand. Weight and price are not constraints. I want the best optic quality and balance between light gathering and magnification. I am typically aging and rough scoring deer from 100+ yards, which is why the magnification is important to me. I appreciate any suggestion you might have for me.

Answer

Many people ask me about hunting binoculars, wanting to know what to get and don’t really give me any more details than that, so it is great that you are being a little more specific. As I suggest in my section on Binoculars for Hunting, the general rule is that a wider field of view is more important than the magnification and an easy to carry binocular is better than a larger bulkier one.

But this is a general rule and assumes that there is tracking involved, possibly in dense vegetation, meaning that you need to carry the binocular with you, possibly for great distances.

So what if you are hunting from a hide (blind or stand) and there is some wide open areas where you can spot game at larger distances?

Magnification

The good news is that because you are in a hide, the extra image shake that you get with a high powered binocular can be countered by you either being able to rest your elbows on a steady surface or you could even consider mounting the optics on a tripod, car Window Clamp/Mount or Hide Clamp using a Binocular Tripod Adapter. If you do decide to go down this route, you can get a very high powered pair of binoculars, you just need to make sure that they are tripod adaptable. Another option would be to get a pair of image stabilized binoculars.

The other down side to high powered binoculars is that the field of view tends to get smaller the higher you go. I personally feel that a magnification of between 12x and 15x will be sufficient for your needs and you will easily be able to age and score deer from well over a 100 yards. It will also mean that you can also use your binoculars without any form of steady base (unless you have very unsteady hands) and can be used in a variety of different situations.

Size

Again because you are hunting from a hide, you rightly say that weight and size are not an issue, so we will mostly be looking at full sized and large binoculars (with a objective lens diameter of about 42mm or more).

The advantage here is that the larger objective lens diameters will let in more light, producing a brighter image, which means that the binoculars will work far better in poor light conditions than compact or even mid sized versions.

As most wildlife, including the deer and antelope that I am used to is most active in the early morning and late afternoons, early evening when the light is not at it’s best, this is a real bonus.

Waterproofing & Toughness

The general advice when choosing top hunting binoculars is to look for a pair that will easily handle anything that you can throw at them, again this usually assumes that you will be tracking the animal. I assume that this is not too important for you, so it’s nice to have but not critical and to be honest because you want a high quality pair of optics, they usually have an excellent quality exterior and are 100% fog and waterproof anyway.

I mentioned in the magnification section that you could consider a pair of binoculars that come with image stabilization. I wouldn’t normally recommend them as a pair of binoculars for deer hunting because of the added weight and the electronics make them less “tough” than standard optics, but in your case this may be a viable option?

Price
You say that price is not a constraint, which is great and means we can look for an excellent quality pair of deer hunting binoculars. Remember one of the worst combinations you can put together in the world of optics is a cheap high powered pair of binoculars – if you are looking for a high powered pair of optics, it is best to get the best quality you can afford.

If you have a good budget but is not unlimited but still need a really high end pair of optics, then I would suggest looking at either the Celestron Granite ED 12x50 or if you want more than 12x power, take a look at the Steiner HX 15x56, Minox BL 15x56 or 13x56 BR Binoculars.

If price is no object and you simply want the best high powered hunting binoculars that you can buy then the 12x50 Swarovski EL’s or Vortex Razor HD’s should most certainly be on your very short list:

BinoWizard’s Top Pick:

Objective Lenses on the Steiner HX 15x56 Binoculars

Steiner HX 15x56 Binoculars

Steiner HX 15x56 BinocularsThese high power Steiner binoculars are most certainly up there with the very best high power hunting binos that I have ever tested and reviewed and in my opinion if you are looking for the very best in this category, then I highly recommend taking a close look at them.

Designed and made in Germany specifically with hunting in mind they contain many features and details that as a hunter you will appreciate:

This includes an almost bomb proof, water and fog proof chassis with a tough rubber armouring exterior. They also have shields on the eye-cups designed to block out light and distractions from the periphery of your view.

A quick-release neck strap system that can also quickly be swapped over to a hunting bino harness with the included split rings near the connectors.

Optical Highlights

  • Large 56mm Objective Lenses
  • Fully Multi-Coated Optics
  • Protective hydrophobic exterior lens coatings
  • N-BaK1 Roof Prisms that are both Phase Corrected wand Dielectrically coated
  • Field of view: 241ft at 1000yds

This very high level of optical components, coatings and obvious expertise that we have come to expect from optics made in Germany, all come together to deliver an image that I thought was not only incredibly bright for a 15x power, but had surprisingly low levels of color fringing.

Reviews
Read my full Steiner HX 15x56 Binocular Review

Price & Where to Buy
This superior quality does not come cheap, but then again you do in my opinion get what you pay for and that is a seriously great pair of binoculars. At the time of writing they cost around $1000 / £1000, which has to be said is less than some of the other alpha brands from Europe. You can check for the current prices in the US, UK as well as other countries by following the links below::

USA: Price & Where to Buy

UK: Price & Where to Buy

Best Hunting Binoculars – 12x Magnification or Greater

Below are a few suggestions, I am sure there are many other options for you to consider, but the models below are the ones that I can confidently recommend to you:

Celestron Granite ED 12x50 Binoculars

Celestron Granite ED 12x50 BinocularsWith the Celestron Granite, you know you are getting a truly excellent pair of bins and at a more than reasonable price.

I can say this with great confidence, because even though I have not tested this exact model, I have fully tested and reviewed both the 8x42 Granite that that went on to win the award as the best birding binocular for that year and then also the more compact 9x33 Granite that won my award as the best safari & travel binocular a year later.

Main Features

  • Extra-low Dispersion (ED) Glass Lens Elements
  • Fully Multi-coated
  • Phase Corrected Roof Prisms with the highest reflective Dielectric coatings as well
  • Field of view: 279 ft at 1000yds
  • Weight: 30.4oz

Price & Where to Buy
At the time of writing, the 12x450 Granite was on sale for around $380 / £430:

USA: Price & Where to Buy

UK: Price & Where to Buy

Swarovski EL 12x50 Binoculars

Swarovski EL 12x50 BinocularsIf you have a large budget and you simply want the very best hunting binoculars, then I can without hesitation highly recommend the new Swarovski EL 12x50 Binoculars. Yes, once again and as of yet I have not had the chance to test this exact configuration, I have reviewed a number of other Swarovski EL binoculars over the years (read my Swarovski EL 85.5x42 review here or look at all my Swarovski reviews here) and all without exception are truly superb.

Important Features

  • Legendary Swarovski Optics and Coatings deliver the highest quality images possible
  • Includes new FieldPro package with their revolutionary neck strap
  • Very Wide Field of View: 300ft @ 1000yards.
  • Weight: 35.2 oz

Price & Where to Buy
These top end Swaro binos will set you back around $2800 in the US or about £2000 in the UK:

USA: Price & Where to Buy

UK: Price & Where to Buy

Vortex Razor HD 12x50 Binoculars

Vortex Razor HD 12x50 BinocularsThis 12x50 Vortex Razor HD is another high end binocular that I can completely recommend without any reservations.

A while back, I tested and then fully reviewed the Vortex Razor HD 8x42 Binoculars and I have to say that I was completely blown away. They were and indeed still are one of my favorite binoculars of all time.

Don’t be mistaken, even though they went on to win the Binocular of the Year award way back in 2012, these are as relevant and state of the art now as they were back then (optics don’t improve at the same rate as electronics for example). In fact this is a good thing as they are now far less expensive than when first released.

Also keep in mind that all of the components contained in the 8x42 are found in the 12x50 model and so you can be sure that you are getting one of the best high powered hunting binoculars out there – indeed one of the best no matter what use you have for them.

Important Features

  • The very best APO optical system
  • High density, ED glass & Fully multi-coated Optics
  • Phase correction & dielectric coatings on the prisms
  • Open hinge magnesium body
  • FOV: 285 feet at 1000 yards
  • Weight: 28.7oz

Price & Where to Buy
The 12x50 Vortex Razor HD binoculars cost about £1150 in the UK, or $1299 in the US:

USA: Price & Where to Buy

UK: Price & Where to Buy

Minox BL 15x56 or 13x56 BR Binoculars

Whilst I have not reviewed either of these specific models, every pair of Minox binoculars that I have reviewed has really impressed me, this is especially true for the Minox 8x33 BL Binoculars – that are also part of the BL series that these more powerful versions come under.

The large 56mm objective lenses will ensure that plenty of light enters the system, so are ideal in poor light conditions. They also have multi coated lens elements which guarantee quality optical performance and natural color rendition of the subject in view.

Phase correction coatings have been added to the prisms, which is another sign of their high quality and will produce an image of exceptionally high detail and rich in contrast, even in poor lighting conditions.

Nitrogen gas filling prevents fogging of the optical surfaces on the inside, even with extreme temperature fluctuations. Based on a sophisticated sealing technology developed by MINOX engineers the BL 15x56 BR and the BL 13x56 BR are also fully watertight down to a depth of five meters.

The MINOX BL 15X56 has also been fitted with a tripod thread making it easier to attach a tripod using an adaptor.

  • Tough and 100% Waterproof
  • Phase Coated Prisms
  • Fully Multi-coated Optics
  • Tripod Adaptable
  • Field of view: 263 ft at 1000yds (13x56) / 215 ft at 1000yds (15x56)

USA: Price & Where to Buy

UK: Price & Where to Buy

Canon 18x50 or even 15x50 Image Stabilized Binoculars

If you are looking for a very high powered pair of binoculars and don’t want to use a tripod or clamp, then either of these are ideal as the Image stabilization works well. The quality of the optics and their coatings are also excellent. More on Canon Image Stabilization Binoculars

  • Very high powered 15x or even 18x Image Stabilized Binoculars
  • Water-resistant construction – will be fine in light rain just don’t get them drenched
  • Large objective lenses means they let in plenty of light
  • Ultra-low dispersion (UD) glass elements for exceptional image quality
  • Doublet field-flattener for sharp, distortion-free images from edge-to-edge

USA: Price & Where to Buy

UK: Price & Where to Buy

Steiner 12x42 Predator C5 Binoculars

The Steiner Predator C5’s use a new optical system – they now have new fully multi-coated optics and completely new shock and waterproof housing. The new Predator C5 now has a much higher degree of light transmission, image resolution and color contrast than previously available.

The Steiner Predator binocular was developed as a special tool for hunters and nature observers and for the American hunter in particular enabling them to more easily spot animals in a woodland setting. Developed about 10 years ago, the concept is simple – boost the transmission of red and brown shades (the “right” side of the color spectrum towards infrared) while slightly reducing transmission of the “left” side of the spectrum (blue, green and UV light) to make animals and other objects “pop out” of the background.

  • Tough and 100% Waterproof
  • Fully Multi-coated Optics
  • Field of View – 276 feet @ 1000 yards

USA: Price & Where to Buy

UK: Price & Where to Buy

Steiner 12x40 Predator Pro Binoculars

These Steiner binoculars have been designed for hunting, and give you a high power magnification and amazing contrast with a high depth of filed into one. The Predator Pro binocular’s have a unique high contrast lens coating that helps you to more easily distinguish subjects (like deer) against green-colored foliage. This latest Predator model, with the “Pro” designation, offers high light transmission while maintaining optimal levels of contrast.

  • The 12x40 Predator Pro uses what Steiner call their auto focus system that, once set for the user’s eyes, keeps all subjects in focus at distances from approximately 30 yards to infinity. These “Self Focusing Binoculars” make it easier for hunters to scan an entire landscape without having to readjust focus. It can also be faster in locating wildlife since the entire depth of field is constantly in focus. For more on this take a look at my page on Auto Focus/ Always in Focus Binoculars
  • Tough and 100% Waterproof
  • Field of View – 264 feet @ 1000yards
  • More on Steiner Predator Binoculars

USA: Price & Where to Buy

UK: Price & Where to Buy

Canon 12x36 IS II Image Stabilized Binoculars

  • Image Stabilized Binoculars
  • Water-resistant construction – will be fine in light rain just don’t get them drenched
  • Field of View – 262ft at 1,000 yards
  • The Image stabilization works well and as size and weight are not issues with you – this may be a real option. More on Canon Image Stabilization Binoculars

Steiner 12x30 Wildlife Pro Binoculars

I have included these Steiner binoculars as an option if you want to consider a smaller more compact pair, but still with a 12x magnification.

  • Mid Size Binoculars – Dimensions: (inches) 5.9Lx1.85Hx4.2W
  • Water & Fogproof
  • Field of View – 220ft at 1,000 yards
  • Quality optics including phase corrected roof-prism mirrors

Best Hunting binoculars – More Options


Kowa 10.5x44 Genesis XD Binoculars

  • Full Sized Binoculars
  • Water & Fogproof
  • Field of View – 324 ft at 1,000yds or 108 m at 1,000m – not bad considering the 10.5x magnification
  • Down on power, but these are one of the best full sized binoculars I have ever reviewed, with a super high quality as well as bright image

Binoculars for Hunting – Further Reading

Have A Question For Me?Need Some Bino Advice?

If you have a question about a particular binocular, or just want to know about a technical term or feature that I have not already covered on BBR, I would love to try and answer it for you: Ask Me Here

Share

The post Best High Powered Binoculars for Hunting appeared first on Best Binocular Reviews.

Leupold BX-5 Santiam HD Binoculars now available in 42mm versions

$
0
0

BX4 Pro Guide HD and BX5 Santiam HD binoculars

As well as their large, high power 15x56 model designed for long range use, Leupold have recently announced that they will extend their BX-5 Santiam HD binocular series to include the more traditional 8x42 and 10x42 configurations, which will appeal to those who are looking for a more general use type of instrument.

Leupold BX-5 Santiam HD BinocularsImpressive Features

The BX-5 Santiam HD is Leupold’s flagship range and as you would expect includes many very high quality, top end components:

  • HD Optical System
  • ED Glass Elements in the Objective Lenses/li>
  • Fully Multi-Coated Optics
  • BaK-4 Abbe-Koenig Roof Prisms
  • Phase Correction Coatings
  • Glassfiber reinforced polymer chassis
  • Nitrogen filled water proof and fog proof
  • Tripod Adaptable

All models within the BX5 Santiam HD series will be supplied with Leupold Pro Gear accessories which include their Go AFIELD shoulder strap, binocular case, and binocular tripod tray.

As well as this, the Leupold’s BX5 Santiam HD binoculars are covered by a Lifetime Guarantee.

Color Options

Leupold BX-5 Santiam HD Binoculars in  SITKA Open Country camoDesigned with hunting in mind and ensuring that they meet the needs of hunters in different environments.

So just like the 15x56 Leupold BX-5 Santiam HD Binoculars, the new 8x42 and 10x42 versions will be available in their standard “Shadow Gray” finish as well as two camouflage options: Sitka Gear Sub-Alpine and Sitka Gear Open Country.

Cost & Where to Buy

The 15x56 model has an MSRP price of $1,819.99. At the time of writing this, I had not yet been able to find any information regarding the prices of the 8x42 and 10x42 models.

You can check for current prices using the link below:

Buy & Compare Prices: Leupold BX-5 Santiam HD Binoculars

Share

The post Leupold BX-5 Santiam HD Binoculars now available in 42mm versions appeared first on Best Binocular Reviews.

Using Binoculars for Astronomy

$
0
0

Celestron SkyMaster 12x60 Binoculars

Most people associate telescopes and night-time with astronomy. On the other hand, binoculars are the instrument of choice for many astronomers, especially as a “grab and go” instrument or for viewing large objects.

You can start off using binoculars that you have bought for other purposes, then consider a pair specifically for astronomy later.

Seven SistersThe key quality of binoculars is that they gather more light than your eyes alone. Larger binoculars have larger main (objective) lenses and gather more light than smaller ones. They make faint objects brighter and make some faint objects visible.

For example, if you look at the well-known star cluster the Seven Sisters (image right), you will see between six and 19 stars, depending on the clarity of the sky, light pollution and your eyesight. Using binoculars of about 50mm aperture, the number rises to around 30 to 50.

The distance between the stars is larger using binoculars for astronomy, thus making the view very pleasing. The photograph on the right shows how you can expect the Seven Sisters to appear in medium-sized/power binoculars.

Key Binocular Statistics for Astronomy

Binoculars are usually labelled with their magnification and aperture in millimeters(mm). For example, a pair of binoculars described as 12x50 has a magnification of 12 times and an aperture of 50mm.

The square of the aperture is related to the amount of light gathered. The exit pupil is the width of the beam of light leaving the binoculars at the eyepiece end and is the aperture divided by the magnification. 12x50 binoculars have an exit pupil of about 4.3mm.

The exit pupil should match the pupil width of the observer as closely as possible. For example, at a suburban place at night an adult has a pupil width of between 4 and 5mm, although this varies between people.

If the exit pupil is too wide, then some of the light hits the iris (of the eye) and not the pupil (however it does make it easier to line up your eyes with the shafts of light). If the exit pupil is too narrow, not all of the pupil is being used. In both cases, any shown objects appear fainter.

For terrestrial observation, the field of view is most commonly expressed as the width of the image you see at a certain distance (usually at 1000m or 1000 yards), but can also be measured in degrees (which is more commonly used in astronomy). Binoculars of the same magnification have varying fields of view, but is often approximately 50 divided by the magnification, regardless of the aperture.

As a comparison, the Moon is ½ degree wide. If the magnification is too large, objects can appear fainter, due to the narrow exit pupil and large objects cannot be seen in their entirety.

The Moon through Binoculars

The Moon is an ideal object to start with. It is bright and easy to find. You will learn a lot of observing skills that you can apply to other objects.

First Quarter
The photograph on the right shows the first quarter moon. The stand-out features are the seas (now known to be lava-filled plains) and the craters.

You can see these, even in small, otherwise inadequate ones. I have seen craters in 8x25 binoculars bought for £3.99 in a petrol station!

I prefer to use my 15x70 binoculars, as they show more detail. Not only does the additional magnification help but so does the larger aperture.

Many people find that larger binoculars need a tripod. I have quite steady hands, so I would suggest that 12x60 binoculars are more suitable for beginners for lunar viewing.

The Full Moon
Many experienced astronomers do not like the full moon, but I find it has a charm of its own.

Although the craters are not as prominent as at first quarter, you can see all the seas. Most craters are difficult to see, as the Sun is shining directly at them. Younger craters, such as Tycho (to the bottom and just to the left of centre) have ray systems that cover a large area of the lunar surface. They are caused by material ejected from the impact that caused the crater. For older craters, this material has been eroded by the solar wind.

You can also see the Moon around the time of last quarter, but it is more of an early morning object. You can also view the Moon during daylight, especially with large binoculars. A suitable telescope can show more detail than binoculars but requires more time to set up and is far less portable.

Full Moon

Viewing Planets with Binoculars

Planetary viewing is often better suited to telescopes, with their higher magnification and, generally, wider aperture. However, binoculars should not be discounted altogether as large, high power binoculars can show you some pretty cool stuff. For example:

  • The phases of Venus
  • Jupiter’s Galilean Moons
  • Titan, Saturn’s largest moon

Venus

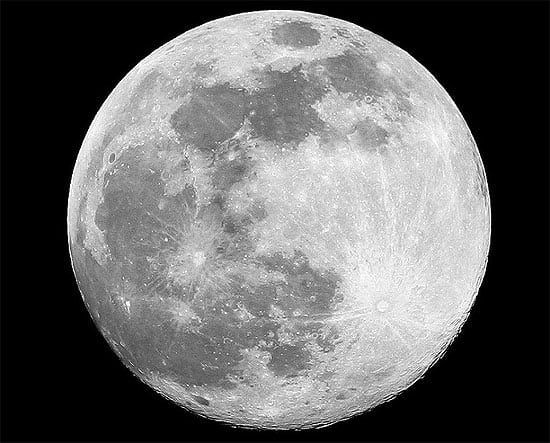
Most of the time, Venus is a long way from us and only appears as a bright blob. When it comes within about 50 million miles of us, you can see the phases through binoculars, rather like the Moon but with no surface detail.

The photograph on the right shows Venus when it was within 30 million miles and a very thin crescent. This occurs about once every two years.

Jupiter With Moons

Jupiter and its Moons

The diagram above shows Jupiter, its moons and some background stars. Only the brightest four are visible to binoculars when they are not behind, in front of or in the shadow of the planet. Large binoculars with high magnification give you the best chance of seeing moons that are close to the planet.

Saturn And Titan

Saturn with Titan

Saturn appears as an oval shape in binoculars or it appears as a planet with handles because of the rings. Titan is quite faint and the only moon visible in large binoculars.

Deep Sky Binocular Astronomy

Many objects beyond our solar system, known collectively as “deep sky” are faint and large and ideal targets for binoculars. Examples are:

  • The Seven Sisters
  • The Hyades
  • The Beehive
  • M35
  • Melotte 20
  • Melotte 111
  • The Wild Duck Cluster
  • Perseus Double Cluster

Other objects within the range of small binoculars are:

  • The Orion Great Nebula
  • The Andromeda Galaxy

Large binoculars can show a lot more objects and reveal more detail in the brighter ones.

The only challenge for raw beginners is to learn how to find these objects and when they are visible.

Further Reading

If you would like some more information on using binoculars for astronomy, be sure to check out these guides:

Guide to Choosing the Best Binoculars for Astronomy
Best 10x50 Binoculars for Astronomy

About Philip Pugh:

Philip is an uninteresting person who does interesting things. He had his first magazine article published in 1980 and has published four books in Patrick Moore’s “Practical Astronomy” series including those shown below.

Like nearly all writers, he has a “day job” and has spent most of his working life as a trainer or technical author. These days, astronomy is his only active interest outside work and family. He is best known for his interest in the Sun and one of his many activities is to monitor activity using binoculars (with suitable filters). He is also a keen photographer and takes quality photographs using budget equipment.

Share

The post Using Binoculars for Astronomy appeared first on Best Binocular Reviews.

Viewing the Moon with Binoculars

$
0
0

Can you see the moon with binoculars?

Answer: Most certainly! You can often get the best views of the moon through binoculars. In this guide we go through why, all the options, which ones are best for you and your budget.

The following guide to looking at the moon with binoculars was written for BBR by published amateur astronomer Philip Pugh. It not only includes some great information as to the ideal configurations that make up the best binoculars to see the moon with, but he also breaks it down into the different luna phases and how this can alter what can you see on the moon with binoculars.

Please Note: I have also added some actual recommendations based on his advice and thus I hope this will be as interesting and useful to you as it was for me.

Binoculars are suitable for viewing the Moon, especially if you wish to see the full lunar disc and want a quick view, with minimal set-up time.

Also, binoculars are extremely portable. Mine have traveled to many places, worldwide, including New Zealand, which is about as far as you can get from England, without leaving our planet.

What are the Best “Moon Binoculars”?

Just about any pair of good quality binoculars can enhance lunar detail beyond what you can see with your eyes alone. However, a suitable choice will deliver the “wow” factor, especially to those who have never seen the Moon through binoculars or a telescope before.

If you choose even more carefully, you can choose ones that are also suitable for other types of astronomical viewing.

Full Moon with Binoculars


Unlike the considerations for other objects, exit pupil size is not that much of a big deal for lunar viewing. The Moon is extremely bright, especially around the time of a full moon, when it reaches maximum brightness.

Aperture (objective lens size) is of great importance, as it is related to the degree of fine detail that you can see on the lunar surface. The larger the lenses, the more light the instrument can gather and thus create an image with. However larger lenses are heavier and more expensive, so you have to balance portability, usability and price against image brightness and detail.

Magnification helps, too, but too high a magnification and you cannot achieve a steady view without very steady hands or a tripod. Also, if there are any optical defects in your binoculars, these are magnified, too. Higher powers also reduce the field of view. Remember one of the big advantages of binocular astronomy over using telescopes is that you get a nice wide view of the night sky.

Celestron 12x50 - Ideal moon watching binocularsAny chromatic aberration is very noticeable on the Moon, especially blue and red fringes on each side. It is a matter of personal preference, but I prefer to use binoculars for grab-and-go astronomy and if I need a tripod, I may as well carry a telescope out.

As a rough guide, a pair of 12x50 binoculars are good binoculars to see the moon with and an ideal start for a beginner. Viewing the moon through 10x50 binoculars also has it’s advantages. The lower power makes it easier to keep the image still and this combined with the 50mm objectives, gives you a nice sized 5mm exit-pupil, which makes for a brighter image that can mean you actually see more detail, especially in the thin crescent phases when less light is available (I will get to this later on in the guide).

Note: Smaller, more lightweight and lower power 10x40 or 8x42 binoculars will be easier to hold and keep steady and thus will often be a better option for a child or those with unsteady hands. The lower power means that you still maintain a good size exit-pupil even though the objective lenses (Aperture) is far smaller. As well as lunar observation, these configurations are also suitable for other astronomical use.

The Lunar Cycle & what can you see on the moon with binoculars

“New Moon” is when the Moon, Sun and Earth are roughly in line. Except for a rare solar eclipse, the Moon usually passes above or below the Sun in the sky.

A day or two later, the Moon appears as a thin crescent in the evening sky.

The best time to see this phase is winter and spring.


Viewing the Crescent Moon with binoculars

The Crescent Moon

When the Moon is within three days past new phase, it is very difficult to see a lot of detail, unless you have large, high power binoculars.

However this does not necessarily mean that you have to get some giant astronomy binoculars as you will usually see some shading with binoculars in the 30-60mm aperture range.

Just keep in mind that an instrument with higher powers and larger objectives will also show some small craters, as in the photo on the right.

Waxing Crescent Moon with Binoculars

Waxing Crescent Moon

As the Moon approaches its half phase (also known as first quarter), some of the “seas” appear.

To the left is Mare Crisium (Sea of Crises) and Mare Tranquilitatis (Sea of Tranquillity). More detail becomes visible in binoculars of all sizes and several craters will become within range of small binoculars, even an 8x25.

The best place to find craters is along the terminator – the line that separates the light side of the Moon from the dark.

Waxing Gibbous Moon

Viewing the Waxing Gibbous Moon with BinocularsThe half-phase (or first quarter) is a popular time for lunar viewers but I like it even more just a day or two later, when the phase is called waxing gibbous.

At that time, the southern craters become visible, including Clavius, which can even be seen by sharp-eyed observers without binoculars. Clavius is the large crater at the bottom of the photo.

Above and to the left of Clavius is the prominent Tycho. Tycho is the source of the ray systems that dominate the moonscape at full moon and after.

Both Tycho and Clavius are well within the reach of small binoculars. As you move up through the binocular sizes and magnifications, more craters become visible.

My 15x70 binoculars show scores of craters in this area.


Viewing the Waning Gibbous Moon with Binoculars

Waning Gibbous Moon

After the Moon reaches its full phase, the terminator moves from right to left and Mare Crisium and its surroundings show more detail in every size of binoculars.

Unfortunately, as the Moon moves further round its orbit around Earth, it rises later in the evening and is less conveniently placed.

In summer and autumn, the waning gibbous and third quarter moons rise soon after midnight.

However, you can see the Moon at these phases high in the west around sunrise.

After sunrise, you will not see much detail on the lunar surface with small binoculars, but large binoculars can deliver a nice surprise.

Viewing the Waning Crescent Moon with binoculars

Waning Crescent Moon

The photo on the right shows the Moon just after the half phase.

Here with the waning crescent moon, you can see details of Clavius and Tycho at the bottom but the ray systems from Tycho and other craters have gone.

Also, the moonscape is dominated by the large Oceanus Procellarum, with few features visible.

The crater Copernicus is near the middle of the terminator but is a difficult object for small binoculars. So for best results you really should once again invst in some higher power astronomy binoculars.

Thin Waning Crescent Moon with binoculars

Thin Waning Crescent Moon

As the Moon nears its new phase, it is only visible as an ever-shrinking crescent in the morning sky.

It is not as spectacular as the waxing crescent moon and the stand-out feature is Grimaldi, the dark spot near the bottom. It is a crater that was filled with lava sometime after the impact.

Here because there is less light, you really do need to get a good pair of larger binoculars for astronomy to get the best views possible.


Moon Binoculars – Recommendations

It is tempting to consider buying zoom binoculars for lunar viewing, but these have problems with distortion, especially when used at or near maximum magnification.

Binoculars have short focal lengths, relative to telescopes, so are prone to chromatic aberration. This is reduced with better-quality binoculars but, if you can afford them, binoculars made with extra-low-dispersion (ED) lenses are much better.

However, even small low-quality binoculars can reveal enough detail on the lunar surface to delight the uninitiated.

If you have any spotting scopes or are considering buying any, they are also suitable for lunar viewing.

In general, the wider the aperture and higher the magnification, the better. If possible, use a spotting scope with interchangeable eyepieces, rather than a zoom eyepiece.

Unfortunately, most spotting scopes do not come with eyepieces of standard size, so cannot be used with telescopes.

Like binoculars, spotting scopes with ED lenses deliver much higher quality.

Further Reading

If you would like some more information on using binoculars for astronomy, be sure to check out these guides:

Guide to Using Binoculars for Astronomy by Philip Pugh
Guide to Choosing the Best Binoculars for Astronomy
Best 10x50 Binoculars for Astronomy

About Philip Pugh:

Philip is an uninteresting person who does interesting things. He had his first magazine article published in 1980 and has published four books in Patrick Moore’s “Practical Astronomy” series including those shown below.

Like nearly all writers, he has a “day job” and has spent most of his working life as a trainer or technical author. These days, astronomy is his only active interest outside work and family. He is best known for his interest in the Sun and one of his many activities is to monitor activity using binoculars (with suitable filters). He is also a keen photographer and takes quality photographs using budget equipment.


Share

The post Viewing the Moon with Binoculars appeared first on Best Binocular Reviews.

Who makes RSPB binoculars? – Question Answered

$
0
0

RSPB HD 8x42 BinocularsI have had a number of requests recently from readers wondering where and who makes RSPB binoculars, so I thought it may be worth writing a short post about what I have managed to discover:

Who

After a little digging around, it seems that they are produced by Viking Optical who i think organise their manufacture and come up with the designs.

This has been the case for many years, but also includes their newer models like the series of RSPB HD Binoculars pictured on the right.

Where

As for where they are made and as with many, many brands, Viking Optical are not the OEM (Original equipment manufacturer). Rather most of their instruments are manufactured in China. Although I have read that some of their higher end binoculars are made in Japan, but I have as of yet not been able to verify this or indeed which models they are.

Range

At the time of writing, RSPB have about 8 different ranges, each with a number of models within them in different configurations:

  • RSPB HD Binoculars – Roof Prism, 8x42, 10x42, 8x32 & 6.5x32
  • RSPB Puffin Binoculars – Roof Prism, 8x42, 10x42, 8x32
  • RSPB Avocet Binoculars – Roof Prism, 8x42, 10x42, 8x32
  • RSPB HDX Binoculars – Roof Prism, 8x42, 10x42
  • RSPB BG PC Binoculars
  • RSPB WPG Binoculars
  • RSPB Rambler Binoculars
  • RSPB Compact Binoculars

Where to Buy

The full range of RSPB binoculars are for sale in many online stores in the UK:

Buy & Compare Prices: RSPB Binoculars

Share

The post Who makes RSPB binoculars? – Question Answered appeared first on Best Binocular Reviews.

Do I need Binoculars for Safari Holiday? – Question Answered

$
0
0

Using Binoculars on Safari

From the days when I was working as a safari guide, to now running Best Binocular Reviews, I have been asked many times over the years if you need binoculars for a safari and my answer has never changed:

A good pair of binoculars is one of, if not THE most important pieces of gear that you can have with you on safari.

As a guide, I noticed that many of my clients would prioritize their camera and capturing photos above everything else and whilst I also enjoy the hobby, if you think about it this is a little strange.

Sure, it is great to capture the memories for you to look back on or share with your friends when you get back home, but I would argue that it is much more important to be in the moment and simply enjoy what you are witnessing. Besides, unless you are a professional photographer, chances are the photos you get will never match or do justice to what you can actually see.

The best way to do this, especially on safari usually means being able to get as close to the action as possible…

On Safari with Swarovski CL 8x30 Binoculars

Wilderness, not a Zoo

Whilst there is no doubt you can get lucky and have elephants or lions surround your safari vehicle (both have happened to me many times), you need to remember that most wildlife sightings whilst on safari will probably be a little further away and this is why binoculars are essential.

It is also important to remember that whilst the iconic and generally larger safari animals like elephants, lions, giraffe, and zebra are what most people go to see, there are also many, many other much smaller mammals, birds, reptiles and even flowers to observe that are every bit as interesting.

The larger mammals are not only easier to spot but are often far less afraid of us humans (or anything else!), so you can usually get much closer to them.

However, the smaller critters are far more wary of us and thus will have a much wider comfort zone. So not only are they smaller and harder to see, but you will usually be viewing them from greater distances.

So here a pair of binoculars can really be essential as they can take an experience from being “oh look at that orangeish cat-like creature way over there in the long grass” to “wow, I never knew that a Serval Cats had white markings on its ears”! (As a side note, these distinctive white markings are thought to assist their kittens by making it more easy to follow through long grass. Many animals have similar such markings, for example, lions have black markings on their ears and ends of their tails).

Serval Cat taken on safari in Kenya Masai Mara

Serval Cat taken on safari in Kenya’s Masai Mara by Ken from Japan

Anyway so you get my point, you most certainly Do need binoculars for safaris.

More Advice

  • How to choose the Best Binoculars for Safaris – My complete guide to help you select the best safari binoculars at your budget and with your particular preferences. Also contains links to full binocular reviews, comparisons and where to buy.

Which Binoculars for Safari?

I would always keep an extra pair of binoculars in my safari vehicle for clients who did not have any and many safari lodges will loan or rent you out a pair.

However, it is far better to have your own instrument that suits your particular preferences. But which one should you get and what makes the best safari binoculars for your needs and budget?

Just about any “standard” binocular will most likely be better than none at all, but there is definitely a number of features and specifications to look out for that will make it easier for you to travel with and enhance the viewing experience whilst on safari even further.

What to look for in good binoculars for safari:

Size

Minimizing size, weight is obviously important on any object that you carry on your safari holiday.

Thus it is tempting to restrict your search to really small compact safari binoculars. For some travelers, this will indeed be the right choice.
But then again, the size of the objective lenses play a very important part in gathering light and thus largely dictate the quality and brightness of the image produced, so perhaps a mid-sized instrument will better suit your needs.

Magnification & Field of View

As I have already emphasized, getting closer to the action is why you need binoculars on safari, then surely it makes sense to get the highest power (magnification) possible?
Wrong, what you want is a good compromise between magnification and the field of view.

Too much power and it can become difficult to locate what you are looking for, impossible to keep the image still (image shake) and severely restricts the width (and height) of the view, meaning you can easily miss out on something on the periphery.

So to make sure you get the right instrument at your budget and for your specific needs, please refer to my article on How to choose the Best Binoculars for Safari Holidays.

Share

The post Do I need Binoculars for Safari Holiday? – Question Answered appeared first on Best Binocular Reviews.


Viewing Planets Through Binoculars

$
0
0

The following guide to viewing the planets with binoculars was written by the astronomer Philip Pugh and is part of a series on using binoculars for astronomy that he has written for Best Binocular Reviews.

In it, he answers some frequently asked questions like:

  • How to see planets with binoculars
  • What do the planets look like through binoculars
  • What planets can you see with binoculars of different sizes and magnifications
  • What planets can you see with 10x50 binoculars

Using Binoculars for Planet Viewing

Whilst a telescope is often the preferred instrument for viewing detail on the planets in our solar system, using binoculars to see planets does have it’s palce, advantages and there are some objects that make suitable targets and are well worth viewing:

Portability, ease of use, price and a wide field of view are some of the advantages that a “panet binocular” has over a scope, however, unless you use very large, powerful binoculars, the bad news is that with a standard pair of binoculars you can never see detail on any planetary surface other than Earths!

However, there is good news and you can see some really interesting features which I will go through in this guide to viewing planets with binoculars.

On top of this, and like I went over in my guide to viewing the Moon with binoculars, you can observe the planets from urban and suburban locations and sometimes during twilight.

Jupiter

Jupiter is the largest planet in our solar system and is a good planet to view through binoculars.

For me, the best “feature” of Jupiter through binoculars is actually the combination of itself along with its four largest moons, all of which were discovered by Galileo and thus are known as the Galilean Moons.

All the moons appear as point light sources to most binoculars and do not look any different from stars. You will, however, notice that they each have different brightness, which is due to their side and the amount of light they reflect (remember unlike stars, planets do not emit light, only reflect it).

The innermost moon is called Io and is often too close to Jupiter to detect with small binoculars, although larger astronomy and planet binoculars, such as a 15x70 give you a much better chance of seeing it.

The next moon of Jupiter is Europa, which is almost identical to our own moon in size but is covered in ice.

The third moon is Ganymede, it is the largest moon in the solar system and larger than our moon and Mercury.

The outermost of the Jupiter’s four moons is Callisto, which can even pass above or below Jupiter in its orbit.

All orbit Jupiter much more quickly than our moon, with Io only taking 1.8 days to complete each orbit.

Using binoculars, you can see them change position quite noticeably during a night. The moons are seen to “disappear” as they pass in front of, behind and through Jupiter’s shadow.

It is important to keep in mind that when the moons are very close to Jupiter, small lower powered binoculars cannot resolve the moons from the planet.

Only with my largest binoculars (15x70) have I been able to see all four moons at the same time, frequently.

I have never seen Jupiter’s cloud tops through any of my binoculars, but it is theoretically possible with much larger binoculars, such as 25x100. However, the cloud tops are a realistic target for spotting scopes and of course telescopes.

Saturn through binoculars

Saturn through binoculars

Saturn

Saturn is the second largest planet in our solar system and is famous for its rings. Because of these, it appears as an oval shape viewing it through most regular binoculars.

More powerful astronomy binoculars will reveal it to have lighter appendages on each side. When Galileo observed this, he likened them to handles.

It is very rare to see any space between the rings and planet.

Over the years, Saturn’s rings become tilted at an angle to us from 0 degrees (edge-on) to 29 degrees.

You cannot see the rings through binoculars when they are edge-on, as they are very thin. Through spotting ‘scopes of at least 60mm aperture, the nature of the rings becomes much clearer.

Like Jupiter, Saturn has cloud tops, but you need a large aperture telescope to see them.

Saturn has several moons but only one, Titan, is visible using binoculars and only large ones of at least 60mm aperture.

Like Jupiter’s Galilean moons, it can disappear when in Saturn’s shadow. Titan can pass behind or in front of Saturn, but this is an infrequent event. Note: Titan can also be confused with background stars of similar brightness.

Venus and Moon through Binoculars

Venus and Moon through Binoculars

Venus

Venus is the brightest planet and can approach to within 25 million miles of Earth.

Why is Venus so bright?

The answer is a combination of factors: Venus is covered in a highly reflective clouds which reflect about 65% of the sunlight that hits it. (the Earth reflects approx 35%, Mars and the Moon around 13-15%). Secondly, Venus is fairly large, (its radius is about 95% as large as Earth’s). Lastly it is because of how close it is to Earth. Only Mars can get as close though it can never get as bright because it is smaller and less reflective than Venus.

Through binoculars, it shows phases in the same way that the Moon does. It can be round the other side of the Sun, when it has a small apparent size and shows a full disc, like the full moon.

When the Sun, Earth, and Venus are in a straight line, with the Sun in the middle, it is called superior conjunction and Venus is not visible at any time of day or night.

After superior conjunction, Venus appears in the evening sky. Although it is at a gibbous phase, it takes some weeks before you can distinguish it from a full phase. This is mostly because Venus appears very small and binoculars are not capable of detecting the slight phase change.

As time progresses, Venus sets later in the evening and you can detect the phase change in increasingly lower powered, small binoculars.

The photo above shows Venus just before it reaches its half phase when Earth, Venus and the Sun are at right angles to each other.

After half-phase, Venus moves closer to us, rather quickly, and appears brighter and closer to the Sun in the sky.

When my 15x70 binoculars first arrived, I looked at Venus and found it a thin crescent phase. At closest approach (called inferior conjunction), it nearly always passes above or below the Sun in the sky. Although it can cross the solar disc, it is not due to for more than a hundred years.

After inferior conjunction, it can take as little as two weeks for Venus to appear in the morning sky. It appears as a thin crescent, then grows in phase, while shrinking in apparent size until it reaches half-phase and maximum distance in the sky from the Sun.

It then goes further around the Sun until it reaches superior conjunction again. The whole cycle takes about two years. The phase is all that you can see with binoculars, as the cloud tops do not show any features in normal light.

Mercury

Mercury is the smallest planet and is nearest to the Sun. Although it follows the same cycle of conjunctions as Venus, it never gets far from the Sun in the sky and is only visible for a few days at a time.
Seeing Mercury at all is a challenge. I have seen the 50% phase through 20x50 binoculars, but it is not easy.

Mars

Mars shows a small disc through binoculars of any size and I’ve never been able to see any surface detail, even when Mars was favorably placed.

Uranus and Neptune

Although you can see both of our outer planets through binoculars, they appear star-like, without any detail due to their small apparent size.

Further Reading

For more in this series and more in general on using binoculars for astronomy, take a look at these guides:

Guide to Choosing the Best Binoculars for Astronomy
Viewing the Moon with Binoculars by Philip Pugh
Guide to Using Binoculars for Astronomy by Philip Pugh
Best 10x50 Binoculars for Astronomy

About Philip Pugh:

Philip describes himself as an “uninteresting person who does interesting things”. He had his first magazine article published in 1980 and has published four books in Patrick Moore’s “Practical Astronomy” series including those shown below.

Like nearly all writers, he has a “day job” and has spent most of his working life as a trainer or technical author. These days, astronomy is his only active interest outside of work and family. He is best known for his interest in the Sun and one of his many activities is to monitor activity using binoculars (with suitable filters). He is also a keen photographer and takes quality photographs using budget equipment.

Share

The post Viewing Planets Through Binoculars appeared first on Best Binocular Reviews.

Binocular Astronomy – Brightness & Magnitude

$
0
0

The following article on understanding the Brightness of objects in our night sky is part of a series of Binocular Astronomy guides written for Best Binocular Reviews by the astronomer Philip Pugh:

Understanding Brightness & Magnitude

Astronomers use a measurement called magnitude to determine the brightness of stars and other objects in the sky. It is expressed as a decimal number.

Objects that are very bright have negative magnitudes.

Some objects have fixed magnitudes, as they do not change much in brightness and others vary in magnitude. For example, planets vary in magnitude, as their distance from us varies considerably. Some stars expand and contract and their brightness varies over days, weeks or years.

Binoculars Star Magnitude
Just how bright objects like galaxies, stars, planets and their moons appear in our skies at night is important and especially important in binocular astronomy as it not only helps you locate them but can help you decide what size and power of binoculars you need.

The Sun

The Sun has a magnitude of -26.7, making it the brightest object in the sky, by far. It is so bright that if you look at it through binoculars you will not only hurt your eyes but cause permanent damage to them. You should only use approved solar filters.

View of the Sun with binoculars & filters

The Sun with binoculars & filters

The Moon

The Moon varies in magnitude, due to its phase and its distance from us. A full ‘supermoon’ where the full phase coincides with a close approach to us delivers its greatest brightness of -12.6. Although a bright moon can cause discomfort to your eyes, it does not cause permanent damage.

These figures suggest that the Moon is half as bright as the Sun, but this is misleading! Magnitude operates on a logarithmic scale and a magnitude difference of 1 between two objects results in a brightness difference of 2.512 times. To make the math simpler, a magnitude difference of 5 results in a brightness difference of exactly 100. The difference in brightness between the Sun and ‘supermoon’ is about 390 000 times!

The Moon

At the fainter end, stars and other objects with a magnitude of 6.0 are visible in a dark sky using neither binoculars nor a telescope. In practice, most of us live in light-polluted skies and there is a thin haze about most nights.

In extreme urban environments, I have experienced skies where the limiting magnitude (the faintest star that you can see) is about 2.0. From my suburban home, the limiting magnitude is about 4.5 most nights.

Larger objects, such as the Andromeda Galaxy are more difficult to see than their magnitude suggests. This is because their magnitude is a measure of the total brightness of the object.

As a rough guide, larger objects are as difficult to see as stars that are two magnitudes fainter. Therefore galaxies; star clusters and nebulae are referred to as ‘faint fuzzies’. Fortunately, even small binoculars can reveal many of these, such as the Andromeda Galaxy (however better views will be attained using larger Astro binoculars). I will provide details on it (and other objects) in forthcoming articles.

Four of the planets can outshine any of the stars in the sky. The table below lists the maximum magnitude of the major planets, excluding Earth:

Planet Maximum Magnitude
Venus -4.6
Mars -3.0
Jupiter -2.7
Mercury -2.0
Saturn -0.5
Uranus 5.7
Neptune 7.7

Uranus is theoretically visible without binoculars but, in practice, I have never achieved it. Fortunately, binoculars with an aperture (objective lens diameter) of 30mm can show both Uranus and Neptune, if you know where to look. Using a search engine, such as Google, shows where each planet is, relative to the stars, and what time it rises and sets.

Canis Major, featuring Sirius

Canis Major, featuring Sirius

Canis Major, featuring Sirius

The brightest star in the sky is Sirius (the Dog Star), which has a magnitude of -1.46. It is visible on winter nights in the northern hemisphere and is nearly overhead from the most populated places south of the equator. It is in the constellation of Canis Major, the great dog. The second brightest star is Canopus, which has a magnitude of -0.72, about half as bright as Sirius.

Alpha Centauri has a magnitude of -0.27 and is a double star, but it needs a telescope to resolve it into its two components. Neither Alpha Centauri nor Canopus are visible from northern temperate latitudes. The final star with a negative magnitude is Arcturus at -0.04, which is in the northern part of the sky and is well-placed during the northern hemisphere spring.

Increasing limiting magnitude with Binoculars

Binoculars extend the limiting magnitude from any location. If the exit pupil (aperture /objective lens size divided by magnification) is roughly the same as the width of your eyes’ pupils, the limiting magnitude is determined by the table below.

Binocular Aperture (mm) Increase in Limiting Magnitude (approx.)
20 +2.9
25 +3.3
30 +3.7
35 +4.1
40 +4.4
45 +4.7
50 +5.0
55 +5.4
60 +5.7
65 +6.2
70 +6.5
75 +6.8

In practice, these figures reduce under conditions that are not totally dark, as the width of your eyes’ pupils are less than the exit pupil of your binoculars.

Even without knowledge of how to navigate the night sky, you notice that you can see many more stars when you casually browse the night sky with binoculars. If you can see the Milky Way, then that is a great place to start. You will notice that the band of white becomes hundreds of individual stars. As you try successively larger binoculars, the number of stars you can see increases even more.

The stars that are visible in the night sky give you a rather misleading impression. Any stars you can see are usually closer or naturally brighter.

Comparing Real Brightness
To compare the real brightness of stars, we measure how bright they would look if placed at 32.6 light years from us. This is called the absolute magnitude.

At this distance, our Sun would become a faint star, with a magnitude of +4.8. Sirius would “dim” to magnitude +1.3, at a similar distance.

As Arcturus is about 29 light years from us, its brightness would stay about the same, but its magnitude would be slightly positive, instead of slightly negative.

The brightest stars would be Rigel (in Orion) and Deneb (in Cygnus), both about magnitude -7.1, making them clearly visible in daylight!

In most skies, the limiting magnitude in daylight is about -3.0 to magnitude -3.5. This makes Venus visible if it is not too close to the Sun in the sky. Jupiter and Mars have been seen in daylight but not by me.

Further Reading

For more in this series and more in general on using binoculars for astronomy, take a look at these guides:

Guide to Choosing the Best Binoculars for Astronomy
Viewing the Moon with Binoculars by Philip Pugh
Viewing Planets Through Binoculars by Philip Pugh
Guide to Using Binoculars for Astronomy by Philip Pugh
Best 10x50 Binoculars for Astronomy

About Philip Pugh:

Philip describes himself as an “uninteresting person who does interesting things”. He had his first magazine article published in 1980 and has published four books in Patrick Moore’s “Practical Astronomy” series including those shown below.

Like nearly all writers, he has a “day job” and has spent most of his working life as a trainer or technical author. These days, astronomy is his only active interest outside of work and family. He is best known for his interest in the Sun and one of his many activities is to monitor activity using binoculars (with suitable filters). He is also a keen photographer and takes quality photographs using budget equipment.

Share

The post Binocular Astronomy – Brightness & Magnitude appeared first on Best Binocular Reviews.

Best Athlon Binoculars for the Money

$
0
0

Athlon Ares 10x42 Binoculars

Athlon Optics have a large selection of instruments in a wide range of prices, so whilst the choice is there, it can sometimes make it difficult to not only find the right configuration for your needs, but which range or series matches your expectations in terms of their function and image quality and at the budget that you can afford.

I have researched, tested, used and reviewed many of their instruments and so feel I know the brand and their lineup really well. So in this article, I wanted to share an insight that became clear to me as to which series offers you the best bang for your buck:

The Best Value For Money Athlon Binoculars

Athlon’s flagship series is the Cronus and sitting just under them is the Ares series. Both of these ranges contain truly great high-end binoculars with just about all the best quality optics, features, and components that you would expect to find at the highest levels (For more details, read my full Athlon Ares 10x42 Binocular Review).

However, you do have to pay top dollar to get such high quality… or do you?

Athlon Midas BinocularsAthlon Midas Binoculars

Third in line in the Athlon stable is the Midas series, which is a really interesting one to me as I believe it is probably the series where you get the biggest bang for your buck and here is why:

The Body

The chassis on the Athlon Midas is made from a magnesium alloy, which as you would expect has a durable rubber armor exterior, is sealed making it fully waterproof and filled with Argon gas to protect inner optics from fogging.

This is exactly what Athlon’s top two series of binoculars, the Cronus and the Ares have and use, so no difference here.

Admittedly with the Athlon Cronus, you do get a few added features like a lockable diopter adjuster located on the central focus wheel and it is these small details that separate it from the rest and is why it is their flagship range.

The Optics

Athlon Midas BinocularsThe fully multi-coated optical system on the Midas includes ED glass lens elements, BaK-4 roof prisms with both dielectric and phase correction coatings and also you get extra protection coatings on outer lens surfaces.

So once again this is EXACTLY the same level of optics used on the Athlon Ares and are all out of the top-drawer.

Indeed they once again come extremely close to matching the flagship Cronus, however, the difference here is that Athlon Cronus binoculars also feature a field flattening optical system which does help deliver sharper images from one edge of the view to the other.

Conclusion

So apart from the body shape, you are getting exactly the same level of components and features as the Athlon Ares, but at a substantially lower price!

And whilst there is no argument that the Cronus is the top dog, both the Athlon Ares and the Midas are in the grand scheme of things, really not that far behind.

So if it is the best of the best you want then the Cronus is the way to go and whilst I think the Ares is also a really great instrument and still offers good value, it is the Midas Binoculars that looks to me to be located right at the sweet spot and is thus the BEST Athlon binoculars for the money.

The Athlon Argos binoculars are also worth a mention and if you want to save a little more cash they are well worth a closer look at (Athlon Argos 8x42 Binoculars Review). Impressively, they have the same level of optics as the Ares and Midas, but where you lose out is in the body as rather than magnesium, the housing is fashioned from a polymer composite material. The main specifications like the field of view, eye-relief and close focus also don’t quite match that of the equivalent Mida or Ares models.

Models

The Athlon Midas comes in the standard and versatile 10x42 and 8x42 models and they also give you the choice between two large aperture versions, a 10x50, that will excel in low light and an even more powerful 12x50 binocular, perfect for long distance observation.

Prices & Where to Buy

Depending on the exact model you choose, Athlon Midas binoculars cost between $280 and $390 in the US and between £600 and £800 in the UK. For current prices in your country, take a look at the link below:

Buy & Compare Prices: Athlon Midas Binoculars

More Details

For more details, their exact specifications and links to reviews, check out my page on Athlon binoculars

Reviews

Share

The post Best Athlon Binoculars for the Money appeared first on Best Binocular Reviews.

Viewing the Pleiades with Binoculars

$
0
0

Viewing Pleiades with Binoculars

In this guide, the astronomer Philip Pugh takes us through how to find and view the Pleiades star cluster, what to look out for and you can expect to see using different configurations of binoculars:

The Pleiades, or Seven Sisters as they are popularly known, are arguably one of the best-known objects in the night sky. They were certainly well-known before the invention of the telescope.

Depending on the quality of your eyesight and the presence or absence of light at your viewing location, you should be able to see at least six to eight stars. Most astronomers are able to observe them from suburban locations, but even from urban locations, the Pleiades are visible as a misty patch.

Why use Binoculars?
Many people ask or wonder just how many stars can be seen in The Pleiades. The answer to this depends on a number of factors:

What is not obvious is that there are many more “sisters”, with thousands of stars that are invisible to your eyes alone. Using binoculars to see them reveals several stars that you would not notice, otherwise.

Are Binoculars Better than a Telescope?
Due to their large apparent size of two degrees, binoculars are the most suitable type of equipment for viewing the Pleiades. Large telescopes may, theoretically, show fainter stars but they can only show a small part of the cluster. Spotting scopes and small telescopes with lower magnifications are also suitable.

How far is Pleiades from Earth?
They are 2,644 million million miles away. At that distance, only the brighter members are visible, even in powerful amateur telescopes. Many of the stars are red dwarves and there are many sub-stellar objects – brown dwarves and planets.

All the stars are quite young, “only” 100 million years old. Nearly all the brighter stars are near the center of the cluster, giving a false impression of its size. Many fainter stars are present away from the center but are gravitationally bound to the cluster, but they can only be photographed by large professional telescopes. There is some nebulosity in the same area, but the Pleiades is passing through it and there is no association between the two objects.

How do you find The Pleiades?

There are a number of ways of how to find pleiades in the night sky and the method you choose will largly depend on your location and the time of year.

In which constellation are The Pleiades?
They are in the constellation of Taurus but, when low in the east are best found at the feet of Perseus. Except for pre-dawn early risers in early summer, they are visible from just after midnight in August to late April dusk.

To find where Taurus is at any given time, you can use an online planetarium app, such as http://tonightssky.com/MainPage.php. Once, you have found Taurus or Perseus, you can find the Pleiades using the photographs below as a guide:

Taurus showing the Pleiades with Binoculars

Taurus showing the Pleiades

Taurus

Taurus is also home to another star cluster, the “V”-shaped Hyades. Like the Pleiades, the Hyades make an interesting target for binoculars.

Perseus

Perseus

Perseus

Perseus contains part of the Milky Way and several interesting objects, such as the Alpha Persei Cluster, which is in the center of the photograph.

Recommended Binoculars for viewing the Pleiades

Any pair of binoculars reveals more stars than are visible with your eyes alone. As for many deep-sky objects, the best binoculars are the largest that you can comfortably hand-hold, however, if you want to use a telescope, then you can go with much bigger, more powerful binoculars.

Magnification isn’t as big a deal as you may think. In many ways, it is more important for it to match the need to keep the exit pupil (aperture divided by magnification) to about a minimum of 4 to 5mm to maintain a bright enough image at night.

The advantage of a higher power is some of the stars are close together, therefore higer magnifications resolve the distance between them and thus will show them as separate stars, rather than a single star.

View of The Pleaiades with 30mm binoculars

View of The Pleaiades with 30mm binoculars

View through 30mm binoculars

The photograph above shows the central region of how the Pleiades appear in a pair of 30mm binoculars from a suburban sky. The actual view that you see is dependent on:

  • The observing location. You will see more stars if the site is away from artificial light and fewer stars from an urban location
  • The clarity of the sky. Many nights are apparently “cloudless” but there is often a haze around. Thin cloud does not render the Pleiades invisible but obscures some fainter stars
  • Whether or not your eyes are adapted to the dark. On short sessions, they won’t be, and it takes about 20 minutes to fully adapt. An interesting experiment is to look at the Pleiades when you first go out and re-visit them later. You will probably see more stars
  • How close the Pleiades are to the horizon. From the southern hemisphere, they never rise far from it
  • Whether the sky is twilit or completely dark.
View of The Pleaiades with 50mm binoculars

View of The Pleaiades with 50mm binoculars

View through 50mm binoculars

The step-up to 50mm makes many more stars visible. On a clear night, 50 to 70 cluster members is possible, with 30 to 40 being more usual.

As with smaller binoculars, the clarity and darkness of the sky and other factors affect the number of stars that you can see and their brightness. I have observed a lot with 20x50 binoculars but now know that a magnification of 10x or 12x is more suitable for binoculars with an aperture of 50mm.

A high magnification increases the distance between stars, so in some ways are easier to detect, but it also magnifies any distortion and hand movement. A tripod helps with this and most good 50mm binoculars should have a thread for a tripod adaptor these days.

However a very high powered 50mm binocular, like a 20x50 will have a very small exit pupil, making the imahe far less bright in low light and thus not ideal for viewing the stars at night.

50mm binoculars with 10x or 12x magnification are fairly easy for most people to hand-hold and are often a good choice as an astonomy binocular.

View of The Pleaiades with 70mm binoculars

View of The Pleaiades with 70mm binoculars

View through 70mm binoculars

70mm binoculars are not often used for normal terrestrial uses like bird-watching, wildlife observation or hunting so any purchase is normally for astronomical use or for long distance observation.

The view through binoculars of this size, with a magnification in the range of 12x to 16x is simply breathtaking on an average cloudless night, let alone an exceptionally clear one.

I own a pair of 15x70 binoculars and have never counted how many stars I could see but estimate the figure to be around 80. I have steady hands but must admit that the view is not only better through a tripod, but makes it much easier on both the eyes (no image shake) and your arms, especially after longer periods.

Larger, more Powerful Binoculars

I have seen a claim that one can see 103 “sisters” with a pair of 20x114 binoculars. I’ve never tried them but suspect that it could be an underestimate.

There is no question that larger binoculars deliver increasingly better views but once magnification reaches 25x, the field of view reduces to two degrees. This is the apparent size of the cluster, so you need to keep adjusting the position of the binoculars to keep the whole cluster in the field of view. There is the same issue with spotting ‘scopes, where the field of view should be at least two degrees.

More

This guide is part of a binocular astronomy series written for Best Binocular Reviews by Philip Pugh that I highly reccomend you take some time to go through. There are also a number or other astro related articles and guides on BBR which will be of interest:

Guide to Choosing the Best Binoculars for Astronomy
Binocular Astronomy – Brightness & Magnitude
Viewing the Moon with Binoculars by Philip Pugh
Viewing Planets Through Binoculars by Philip Pugh
Guide to Using Binoculars for Astronomy by Philip Pugh
Best 10x50 Binoculars for Astronomy

About Philip Pugh:

Philip describes himself as an “uninteresting person who does interesting things”. He had his first magazine article published in 1980 and has published four books in Patrick Moore’s “Practical Astronomy” series including those shown below.

Like nearly all writers, he has a “day job” and has spent most of his working life as a trainer or technical author. These days, astronomy is his only active interest outside of work and family. He is best known for his interest in the Sun and one of his many activities is to monitor activity using binoculars (with suitable filters). He is also a keen photographer and takes quality photographs using budget equipment.

Share

The post Viewing the Pleiades with Binoculars appeared first on Best Binocular Reviews.

Bushnell Trophy Xtreme Binoculars

$
0
0

Bushnell Trophy Xtreme 8x56 Binoculars

All About Image Brightness

The Trophy Xtreme series from Bushnell Sport Optics is a really interesting one.

Containing only three models, this mid-range, fairly low-cost series’ most characterizing feature is that they all have large diameter objective lenses and are thus primarily focused on capturing and then delivering the best low light performance and brightest image possible within the magnification that they have chosen.

Large Lenses

If you think of the lenses on a binocular as you would a window, then you can easily imagine that a large window opening out onto your patio will let in far more light than a small window in your attic for example.

Light Transmittance

So whilst we can now understand that the large objective lenses are key, I think the next most important feature to highlight is that all models incorporate a fully multi-coated optical pathway.

This means that every glass surface throughout the path from the outer lens right through the chassis to the outer eye-piece lens has been treated with a number of layers of a material that reduces the amount of light that gets reflected away or in an undesirable direction.

The result is more light is captured by the objective lenses and then more of this is transmitted right through the instrument and onto your eyes. Therefore the will look to have a brighter image than that of the same size of binocular, but one with fewer or none of these coatings.

Not only Hunting Binoculars

As the word “Trophy” in their name implies, this range, like the “standard” Trophy and Trophy XLT binoculars are principally made with hunters and hunting in mind, however, I would argue that depending on the exact model and magnification you choose, they are every bit as useful to many other types of wildlife observation, birding and indeed general use and here is why:

Bushnell Trophy Xtreme 12x50 Binoculars

This is the high power, long-range model in the series.

Greater Image Detail & Reach
There is no doubt that this high magnification will certainly get you closer to the action and deliver you an image with more detail and makes this model ideal for anyone wishing to observe wildlife or anything else at longer ranges.

The Least Bright Xtreme
However, this added power does come at a cost. Firstly in terms of brightness and mostly due to the smaller exit pupil that the 12x50 configuration produces these well have the lest bright image in low light conditions. Although, having said that with an exit pupil of over 4mm these will not perform very badly in low light, but I think it is safe to say that they will be at their best in wide open areas and in fair to good ambient light conditions.

Reduced Field of View
This increase in magnification also reduces the width of your view. At longer distances, this is not necessarily an issue, but from close range, it can make it difficult to locate and then track your target, especially if it is rapid and/or moving in a haphazard way.

Image Shake
Higher powers also make it harder to keep the image still. However in my experience, if you have reasonably steady hands, 12x is about the limit where this is not a problem. Nevertheless, some users, like those operating from a hide will be interested to know that all Bushnell Trophy Xtreme Binoculars are easily tripod adaptable.

So taking this all into account. I would recommend the Bushnell Trophy Xtreme 12x50 Binoculars to anyone who is game viewing, hunting, on security or rescue duties or even birding in open grasslands, the mountains or at places like the coast.

Bushnell Trophy Xtreme 8x56 Binoculars

Bushnell Trophy Xtreme 8x56 Binoculars
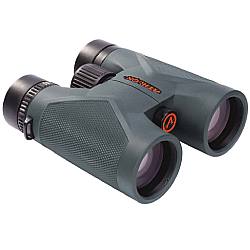
With even larger 56mm lenses and an 8x magnification this model is squarely aimed at those who demand the best low light performance possible:
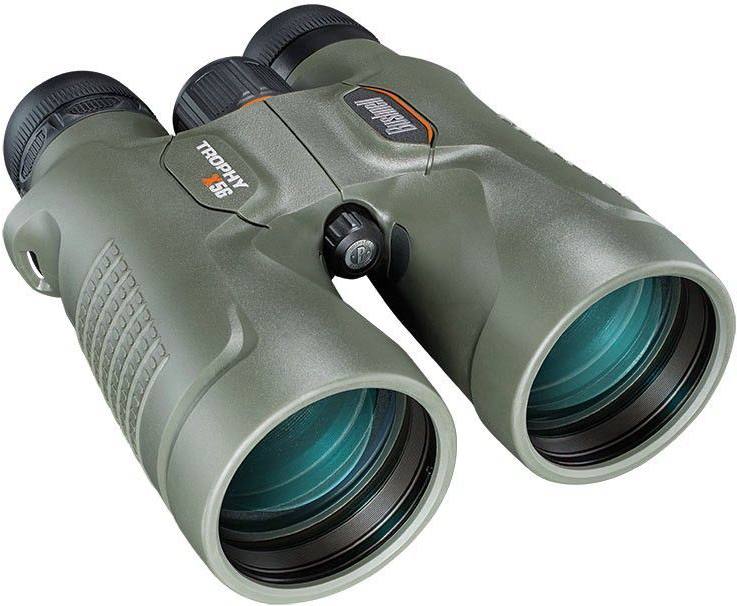
Superior in Poor Light
The 8x56 configuration equates a massive exit pupil of around 7mm which is large enough to ensure that no matter the conditions, the tube of light exiting the eye-piece is large enough so as to be supplying your eyes with more than enough of the available light so that you can perceive a bright image (relative to the conditions).

This these Bushnell Trophy Xtreme 8x56 Binoculars are ideally suited to those who often operate at dawn, just after sunset or in deep dark forests and woods where light can always be an issue.

Wide View
Here the lower power and resultant wider view are actually an advantage as it makes finding and then tracking birds and larger wildlife much easier at the closer ranges that you a likely to be encountering.

For these reasons, I would highly recommend this pair to not only forest type hunters but any wildlife enthusiasts, birders and indeed anyone wanting to use the binoculars in bad light and closer distances.

Bushnell Trophy Xtreme 10x50 Binoculars

I would describe the 10x50 version as the all-rounder in this series and here is why:

The Moderate Xtreme!
The combination of a moderately high power and largish 50mm lenses are a great middle ground for users who perhaps sometimes find themselves in either of the extreme situations mentioned above, but also just use their binoculars in a variety of different ways and for different uses.

Good 10x binocular in Low Light
With 50mm objectives, the binocular itself is not that much larger or heavier than your standard 42mm binocular and so really not noticeably more difficult to carry about or pack away. But the extra 8mm does make a large difference in the size of exit pupil produced: At 5mm in size, it is easily large enough to ensure that you perceive a bright enough image even in quite poor light.

This will interest those who as well in good light during the day, perhaps go out hunting, game viewing or birding early in the morning before sunrise or just after sunset when wildlife is often at it’s most active.

More Stable, Wider View
The slightly lower power also means that image stability is easier to achieve with these Bushnell Trophy Xtreme 10x50 Binoculars than 12x version. You also get a wider view, but not quite as wide as the 8x mode. As I have already mentioned, at closer ranges for example when operating in a forest this can be very important.

Main Specifications

The table below lists the main specifications of each of the models. it is a good way for me to illustrate how as the magnification increases, so the field of view diminishes and how the exit pupil also gets smaller:

Model 8x56 10x50 12x50
Model No. 335856 335105 335012
Field of View (ft.@1000yds / m@1000m) 300/100 315/105 273/91
Close Focus (ft. / m) 10/3 10/3 10/3
Exit Pupil (mm) 6.9 5 4.1
Eye Relief (mm) 17 17 15
Weight (oz. / g) 38.1/1080 31.8/902 31.2/885
Prism Type Roof Prism
Prism Glass BaK-4
Tripod Adaptable Yes
Water & Fogproof Yes
Eye-cups Twist-Up

Prices & Where to Buy

Bushnell market these as the giving you the most bang for your buck in terms of clarity and whilst you can never fully trust the marketing jargon, I do believe that if you are looking for a low cost binocular with an image brightness that is well above average and better than almost any in this price range, then the trophy Xtreme does look to be a good choice.

Depending on magnification you select, Bushnell Trophy Xtreme binoculars cost between $100 and $200 in the US and between £150 and £280 in the UK. For current prices in your country, please follow the link below:

Buy & Compare Prices: Bushnell Trophy Xtreme Binoculars

Further Reading

Share

The post Bushnell Trophy Xtreme Binoculars appeared first on Best Binocular Reviews.

Cosmic Distances – Binocular Astronomy

$
0
0

This guide to cosmic distances and how it relates to viewing the night skies using your binoculars was written by Philip Pugh and is part of his binocular astronomy series written for BBR:

If you have used binoculars for wildlife watching or other terrestrial use, you tend to think that a quarter of a mile or 400 meters is a long distance. If you focus your binoculars on a closer object, say 50 yards, then look at another object further away, you will need to adjust your focus.

Anything further in the distance on land or an airplane flying at over 35 000 feet and your focus becomes effectively “infinite”. Our instinct would suggest that if we focus on an airplane, then move to the Moon that we will need to adjust focus.

In practice, any focus adjustment needed is minimal, as both the Moon are at “infinite” focus. If you have used a DSLR camera with manual focus, it works in the same way. All objects, whether on Earth or in the sky are at infinite focus, once distances become miles or kilometers, rather than yards or meters.

Achieving focus with objects in the sky takes some practice, especially if you do not use a tripod. It is easier with small, light binoculars with low magnification (say 8x or less) than heavy binoculars with higher magnification (15x or more). It is simply an issue of keeping the binoculars still. Another problem I have noticed is that it is harder to keep binoculars still when I am looking at objects higher in the sky. If I am observing the Moon during daylight, dawn or dusk, I often look for a terrestrial object as far away as possible. This enables me to adjust the focus before trying the Moon. Sometimes I have found the infinite focus and other times, I need to make minor adjustments.

Pro Tip:

Here a good set of binoculars can make the difference. What you are looking for is one that has a smooth focus wheel action which will enable you to make the minute changes. Also, very important is one that has low geared focusing mechanism as this can really help with those fine focus adjustments:

Many binoculars will have a gearing for the focusing wheel that results in it taking less than a full turn of that wheel to go from minimum focus to infinity. This is good for making large focus adjustments quickly. So on for general use, this is an advantage as you can very quickly go from viewing birds on your feeder to observing an eagle or even airplane above.

However, it does make fine tuning the focus more difficult. So for uses where you are often making very small focus adjustments, a low geared mechanism, and one that takes two turns or more of the wheel is something to look out for when choosing the best binoculars for astronomy.

Full Moon with Binoculars

The Moon

Whilst some small “space rocks” can come closer to Earth than the Moon, it is not a regular occurrence and most of them are too faint to be seen in binoculars. Sometimes satellites and spacecraft can be seen in Earth orbit. For example, the International Space Station usually orbits the Earth at a height of about 300 miles (500 km). Under normal circumstances, the nearest natural object in space that comes closest is the Moon. This is a quarter of a million miles away, on average. If you fly around Earth on an airplane, it normally takes about 48 hours for a commercial airliner. The Moon is ten times further away than that, so would take about 20 days to reach at airliner speed or about 200 days by car! Although this is counter-intuitive, perfect focus on the Moon is achieved when it is at its smallest, as seen through binoculars.

More: Guide to Viewing The Moon With Binoculars

Venus

Venus With BinocularsAt its closest, Venus can pass 25 million miles away from us, about ten times the Earth-Moon distance. Although Venus is noticeably larger than the Moon, it appears much smaller due to the distance. Note that you can only see the phases of Venus through binoculars and its surface is permanently shrouded in thick cloud.

The furthest object in our solar system that you can see in binoculars is Neptune, with a magnitude of 7.9, at an average distance of 4, 500 million kilometers (2,800 million miles). At this distance, you cannot see a planetary disc with binoculars and it appears as a pale blue dot, usually indistinguishable from many stars.

More: Guide to Viewing The Planets in our Solar System with Binoculars

Astronomical Units

As these numbers are large, it is normal for astronomers to measure distances in the solar system in astronomical units (AU), where 1 AU is the average Earth-Sun distance (about 93 million miles).

At the time of writing, many small objects were being discovered at distances up to 200 AU from us. The exact boundary of our solar system is not known but is widely believed to be about 63 000 AU or about 6 million million miles from us in a region known as the Oort Cloud.

Light Years

Once we leave the solar system, we use another measurement – the light year. A light-year is the distance that light travels in a year and just happens to be about 63 000 AU, or the suspected radius of our solar system.

Objects in the Oort Cloud are difficult to spot, even with large, professional telescopes, as they are very faint. The influence of the Sun’s gravity on the Oort Cloud is very weak and nearby stars have a gravitational influence, too.

The nearest star is Proxima Centauri, a faint red dwarf star that is even too faint to see in binoculars.

Our galaxy is full of red dwarf stars and none of them can be seen in binoculars. Proxima Centauri is in a triple-star system. Its partners are visible to our unaided eyes as Alpha Centauri, a single, bright star visible from the Tropic of Cancer and further south. Large binoculars, with high magnifications, show it as a double star, with components of magnitudes 0.0 and 1.2. Read my guide to Brightness and Magnitude with binoculars here if this number does not mean anything to you.

Canis Major featuring Sirius

Sirius – the Dog Star

The nearest star that can be seen from north of the Tropic of Cancer also happens to be one of, if not the brightest star in the sky. Sirius, with a magnitude of -1.46.

It is in the constellation of Canis Major (the great dog) and is also known as the Dog Star. It is 8 light years away. The photograph above shows where it can be found in the Canis Major constellation.

Cygnus and Lyra with Binoculars

Cygnus and Lyra

The above photograph shows the constellations of Cygnus and Lyra. The bright star near the bottom right is Vega at 26 light years away and magnitude 0.04. Deneb near the top left is fainter at magnitude 1.6 but is a very bright, massive star 1 600 light years away.

Andromeda Grand Spiral Galaxy

The furthest object that you can see with small binoculars is the Andromeda Galaxy at about 2.7 million light years. I have heard authentic reports about people seeing galaxies in the Virgo Supercluster, about 60 million light-years away, with 10x50 binoculars. Personally, I have never managed it in my binoculars but I have seen galaxies in the constellation of Leo at a similar distance.

However, even 60 million light years is a tiny distance compared to the size of the universe, which is at least 13 800 million light years away and suspected by many scientists to be three times that size! That is no less than 82 800 million million million miles!

More

This guide is part of a series written for Best Binocular Reviews by Philip Pugh, which if you are interested in astronomy in general and binocular astronomy in particular, I highly suggest you take time to explore. I also have many other astronomy related guides on BBR which you may also wish to go through:

Guide to Choosing the Best Binoculars for Astronomy
Guide to Using Binoculars for Astronomy by Philip Pugh
Best 10x50 Binoculars for Astronomy

About Philip Pugh:

Philip describes himself as an “uninteresting person who does interesting things”. He had his first magazine article published in 1980 and has published four books in Patrick Moore’s “Practical Astronomy” series including those shown below.

Like nearly all writers, he has a “day job” and has spent most of his working life as a trainer or technical author. These days, astronomy is his only active interest outside of work and family. He is best known for his interest in the Sun and one of his many activities is to monitor activity using binoculars (with suitable filters). He is also a keen photographer and takes quality photographs using inexpensive equipment.

Share

The post Cosmic Distances – Binocular Astronomy appeared first on Best Binocular Reviews.

Bushnell Legend L Series Binoculars Review

$
0
0

Bushnell Legend L Series Binoculars

In this complete guide to the Bushnell Legend L Series binoculars, I will take you through each of the available models within the series, compare them against each other as well as some of the other ranges within the Bushnell line up. I will also provide a quick review of their main components, features, and specifications.

After we have gone through this process, it will then be much easier for us to decide which models are best for the most popular activities like hunting, birdwatching, astronomy and general use.

Bushnell Legend E, L & M Series Binoculars

Bushnell Legend M Series BinocularsBefore we get into the details on this L series, I think that it is important to first step back and take a look at the bigger picture and understand that this series is actually a sub-section of the main Bushnell Legend range, which is divided up into the E, L & M Series.

Bushnell’s idea of dividing them up in this way is an attempt to offer you the best possible performance (in their opinion) within three separate price ranges.

I actually really like this approach, indeed it is exactly how I go about choosing my choices as the best value for money binoculars here on BBR.

Where are Bushnell Legend Binoculars Made?

Answer: As far as I have been able to establish, like almost all of thier current stable, all Bushnell Legend series binoculars are made in China.

  • E Series
    So as a base, or starting point, you have the Bushnell Legend E Series binoculars, these are what I would describe as mid-range instruments.
  • L Series
    Then comes the L series which builds on the E series by adding a number of higher-end components and are what I would describe as being mid-to-high range optics and which in my opinion generally offer the best bang for your buck.
  • M Series
    Then finally you have the high-end Legend M series binoculars that focus a little less on value for money and more on outright performance.

Bushnell Legend L Series Binoculars

Within the Legend ranges, the L series contains the most models (5): The most popular are the 8x42 and 10x42 models, but there is also the larger 10x50 and high power 12x50 models as well as a camouflaged RealTree 10x42 version.

All use roof prisms and have a single bridge body shape.

Optical Features

ED Glass
The biggest improvement to these and what really sets them apart from the cheaper Legend E series is the addition of extra-low dispersion glass elements within their lenses. This ED glass makes it possible for them to reduce the level of chromatic aberrations that occur as the light passes through the lens. The result is a view that displays less color fringing around the edges of objects.

Prisms
The roof prisms used in the Bushnell Legend L Series binoculars are made from high-quality BaK-4 glass which is good but is to be expected at this level. However, what is very good is that they have also been treated with a chemical layer that corrects an issue known as “phase shift” that occurs to light as it passes through a roof prism. The result is a far higher definition view than roof prism bins that don’t have this.

Fully Multi-Coated
Then I just need to confirm that the optics are fully multi-coated, which once again is to be expected at this level.

Extra
Important to note that Bushnell only uses glass that is lead-free and thus friendly to the environment.

They also add special lens coatings to the exterior surfaces that are “Hydrophobic”. This prevents water from settling on the glass and thus not only can you see better when using them in the rain, but it prevents water stains and makes them easier to clean. This has a knock-on benefit as you are less likely to scratch easier to clean lenses.

Exterior & Chassis Features

Bushnell Legend L Series BinocularsAll Legend Series binoculars have a very high-quality Magnesium Alloy Chassis, which is a great start as there will be many of their direct competitors at this level that will incorporate a less robust (but far cheaper) polycarbonate shell.

Water & Fogproof
The binocular is as you would expect sealed and thus fully waterproof. By adding a dry gas to the interior (I think they use Nitrogen) it also makes sure that the internal glass is protected from fogging-up.

Focussing & Calibration
To adjust the focus, there is a large centrally located wheel and all Legend binos have a diopter located on the right eye-piece so that the can be calibrated to match your particular eyesight. Here is where we see another area where these L series binocular improve on the E series as the diopter on these is also lockable.

Armour Protection
All models are tripod adaptable and are covered in a protective rubber armor. The added benefits of this are increased grip levels as well as making the instrument less reflective which helps with camouflage. Note whilst most models are black, Bushnell have also made a RealTree Camouflage version for the 10x42 model.

Main Specifications

Taking a look at the comparison table below, they all look to be well above average in terms of their specifications when compared to most others within their size and magnification class. However, the model that really stands out to me is the 8x42 configuration. It has a really very wide field of view, plenty of eye-relief and a great minimum focusing distance:

Model 8x42 10x42 10x50 12x50
Model No. 198842 198104 / 198105 198106 198107
Field of View (ft.@1000yds / m@1000m) 426/142 340/113 340/113 280/93
Close Focus (ft. / m) 6.5/1.9 6.5/1.9 10/3 10/3
Exit Pupil (mm) 5.3 4.2 5 4.2
Eye Relief (mm) 19 18 15 15
Weight (oz. / g) 23.5/666 23.5/666 29.2/830 29.2/830
Prism Type Roof Prism
Prism Glass BaK-4
Phase Corrected Yes
Tripod Adaptable Yes
Water & Fogproof Yes
Eye-cups Twist-Up
ED Glass Yes

Best Bushnell for Legend L Series Binoculars for Hunting

Bushnell Legend L Series 10x42 RealTree BinocularsGeneral: If I was to pick a model specifically for general hunting, so for use in a variety of habitats, conditions, and ranges, then without much hesitation, I would opt for the Bushnell Legend L 10x42 Realtree version.

For a start, the RealTree color had been specifically chosen to offer a good to high level of camouflage in a wide variety of habitats and conditions. However, it works best during autumn, through the winter and spring when most leaves are at their most variable in color.

Next, for a 10x42, these do have a nice wide view which will help you locate and follow your game when out in the field.

Long Range: For longish range hunts, the 10x42 would still be a good choice, especially if you are concerned with keeping the size and weight of your instrument to a minimum.

However, if you really need that extra reach, say if you hunt in wide open areas, or in the mountains and over very long distance and you are prepared to carry a little larger and heavier instrument, then you should certainly consider opting for the 12x50mm L series binoculars.

Closer Range & Forests or Woods: In these locations, the amount of available light is often far from ideal and the range at which you will be hunting is far less than out on the open planes. So here you often need to be able to quickly locate a target and then follow it if it moves fact, this is where a wider view is more important than a high power.

So here if size and weight are an issue and/or if you need the best views in very low light, especially those that hunt very early in the morning, or after sunset then Bushnell Legend L 8x42 binoculars are a good option. However, if you want the best of both worlds, so a good, but not brilliant low light capability, but also just a little more power, and you are happy to sacrifice a little in terms of weight and size, then go for the Bushnell Legend L 10x50 binoculars.

Best Bushnell for Legend L Series Binoculars for Birding

Without question, the best Bushnell Legend L Series binocular for general birdwatching is the 8x42 model.

As well as great quality optics and coatings that make for a high quality and bright image even in low light, it has a super wide field of view.

Wide View
This is important because it will make it much easier and quicker for you to get the bird you want to observe into view. Then if the bird happens to be small and fast moving, the wide view makes it much easier to follow, especially if it is at close range, like a nearby bush or tree.

So my choice would be the 8x42, but if you conduct most of your birding out in the open, at the coast or along a river or lakefront, then you may also consider one of the higher powered options. Here you sacrifice a little image width and low light ability for greater image detail and reach.

Best Bushnell for Legend L Series Binoculars for Astronomy

Whilst these are not specifically designed as binoculars for astronomy, if you do occasionally like to look at the moon, stars and planets at night, then which one is best?

In some ways this is difficult to answer, instinct says that the Bushnell 12x50 Legend L series would be ideal, it has a high magnification and reasonably large lenses to capture as much light as possible. However, whilst not terrible, the resultant 4.2mm exit pupil is a little on the small side for night time use.

This is why I would probably opt for the 10x50, you will still see just about as much image detail, it will be easier to keep the view steady and you will most likely perceive the image to be much brighter at night with the larger 5mm exit pupil.

Cost & Where to Buy

Bushnell Legend L Series BinocularsAs I stated earlier on in this review, the L series is what I would deem to be a mid-to-high value range.

So what this means is that depending on the exact model you choose and where you look, they cost between approximately $250 and $350 in the US, although I have spotted them on a deal for as little as $140 which I think is incredible value.

In the UK they are available for around £250 and £430.

For current L Serie prices in your country (Included USA, Canada, UK, Germany, France, Spain, Australia and India), please follow the link below:

Buy & Compare Prices: Bushnell Legend L Series Binoculars

Further Reading

Share

The post Bushnell Legend L Series Binoculars Review appeared first on Best Binocular Reviews.


The Beehive Cluster With Binoculars – Astronomy Series

$
0
0

This complete guide to viewing The Beehive Cluster with Binoculars was written in collaboration with astronomer Philip Pugh and is part of a series on binocular astronomy.

It includes details on where and how to find it, the best binoculars to use with examples on what you can expect to see using different powers and objective lens sizes. So for example how Te Beehive looks through a pair of 10x50 binoculars versus a 20x70 or a 25x100:

Towards the end of March and in early April, the winter attractions of the night sky are visible but become progressively more difficult and are eventually lost in the evening twilight, to return to the morning sky in summer.

Fortunately, there are a few attractions suitable for binocular viewing in spring.

One of my favorites is the Beehive, a star cluster in the faint constellation of Cancer. It is also known as M44, as it is No 44 in the Messier Catalogue. Although the Beehive and Cancer are usually invisible from suburban skies, there is quite an easy way to find it:

How to find the Beehive with Binoculars

Ideally, a planetarium application (online or downloaded onto your phone, tablet or computer) will help you find Regulus (the brightest star in the constellation of Leo) and Pollux (the brightest star in Gemini).

If you aim your binoculars at one star and move them slowly in a straight line towards the other star, you will find what appears to be a fuzzy patch of sky but, if you hold your binoculars steady, you should see a close group of stars.

The below diagram shows the position of the Beehive as a blue dot. As well as being on a line joining Regulus and Pollux, it also lies above a group of stars representing the head of Hydra.

How to Find The Beehive with Binoculars - Astronomy Series

How to Find The Beehive with Binoculars – Astronomy Series

Which Binoculars to Use

Whilst the Beehive is a very pleasing sight with something like 25x70 binoculars and you will get more detail, it is actually easier to find it using a less powerful instrument with a wider field of view.

Lower Power = Wide View & Brighter Images

8x56 Binoculars
Steiner Nighthunter 8x56 BinocularsSo here is where something like an 8x56 for astronomy is ideal as you get an extremely good low light performance and thus brighter images, combined with a really wide view that makes finding targets like The Beehive cluster so much easier.

From personal experience, I can highly recommend these Steiner Nighthunter 8x56 Binoculars
(see image right). Specifically designed to excel in low light and even hight time conditions, they are mainly marketed towards the wildlife and hunting markets, but their main features and specs also make for an extremely good pair of wide angle binoculars for astronomy.

10x50 Binoculars
So here is where something like a 10x50 would be ideal – read my guide to the Best 10x50 Binoculars for Astronomy for more help here.

8x42 Binoculars
Or if you want a really wide view, just use your “standard” general use even an 8x42 binoculars which will work perfectly well for this task.

However, it is important to remember that all of the stars within the cluster do appear fainter with less powerful binoculars, especially those that have smaller objective lenses. Indeed some will actually become invisible.

The below photograph is a reasonable representation of how the Beehive appears in smaller, lower powered binoculars (so something like an 8x42 or 8x30). You will see more or less stars than shown, depending on the quality of the instrument you are using, the objective lens size, the magnification, your eyesight and the local conditions.

The Beehive cluster through 8x42 Binoculars

The Beehive cluster through something like 8x42 Binoculars

As you can see above, with a wide field of view, the Beehive only occupies a small part of your view, as it is about 2 degrees in size. Remember, lower powered binoculars like an 8x 7x instrument will probably have an angle of view of about six to eight degrees.

Higher Power = Higher Resolution & More Detail

The Beehive Cluster through 15x70 Binoculars15x70
More powerful binoculars, such as my 15x70s have a smaller field of view of about four degrees, so it makes finding the cluster is more difficult.

However on the plus side, the gap between each star is wider and as long as you have good quality optics and large objective lenses, the stars will generally appear brighter.

The small photograph on the right shows how in my experience the Beehive appears in a pair of 15x70 binoculars.

Even More Power

The Beehive Cluster through  something like 25x100 Binoculars

Celestron Echelon 20x70 Binoculars Review20x70
A great option as it offers a good balance between size and price versus image brightness and detail is a 20x70 configuration. Here I can highly reccomend these Celestron Echelon 20x70 Binoculars.

25x80 & 25x100
There is a practical limit of about 25x magnification when using binoculars or a small telescope. Beyond that, you will not be able to fit the Beehive into the field of view, so can only see part of it at any time.

Most deep-sky observers prefer to see objects in their entirety, rather than just a part of them and which is why most specifically designed astronomy binoculars tend to have a maximum magnification of 25x. Here good choices are 25x100 or for something a little smaller, but having a less bright image, a 25x80 is a popular choice.

The brightest stars in the Beehive are about magnitude 6 to 8 (Read more on Brightness & Magnitude here). However, like most open star clusters, what we see tells only part of the story.

The brightest stars are large, hot blue giants that are very bright and short-lived, with a lifespan measured in millions, rather than thousands of millions of years. By contrast, the Sun is about 4, 800 thousand million years old and is about halfway through its lifetime. Fainter still are red dwarves, with about 1/8 of the mass of the Sun and a mere fraction of its luminosity. These are the most numerous type of stars in the universe and the Beehive is no exception.

The stars of the Beehive are about 577 light years away (Read more on Cosmic Distances Here). At that distance, the Sun would be very faint, about magnitude 18, far too faint to see with binoculars and a challenge for the largest amateur telescopes.

Red dwarves are 10 to 11 magnitudes fainter than that. If one of the brightest stars in the Beehive was at the same distance as the Sun from us, it would shine brighter than magnitude -46. However, this is very hypothetical, as even if our planet could resist the gravitational pull of such a star, any life would be burned to death in a fraction of a second!

As you use larger and higher magnification instruments to view the Beehive, the number of stars visible increases. It is strange to think that even the faint, barely perceptible dots are very luminous stars. I have viewed the Beehive in a medium-sized amateur telescope, my 127mm Maksutov. I used a magnification of 24x, as to fit the Beehive into the field of view (just!). Although I could see more stars, the Beehive pattern was somewhat lost. You can also use spotting scopes to view the Beehive but, as for binoculars, you should keep the magnification to about 25x maximum.

When to View the Beehive

The best time of year to view the Beehive is from February to May when it is visible in the evening sky.

I have seen it as late as July but, by then, it is getting lost in the evening twilight.

Alternatively, you can see it in the pre-dawn skies from late August, if you are an early riser.

Where

The ideal place to see it is away from artificial light, preferably somewhere safe. On the other hand, it is possible to find it under poor conditions and it can even tolerate light cloud and haze. The worst conditions for looking at it (apart from being totally clouded out!) are when haze is scattering moonlight. Ideally, the Moon should be well out of the way when you see it. For example, from February to May, it is best to plan observations in the days before and during the new moon.

Photography
The Beehive is also a great target for photography and you do not need expensive, sophisticated equipment. I have even “snapped” it by holding a camera to the eyepiece of a small telescope. However, if you have a DSLR with a zoom lens, or can use it with a small telescope, even better.

The constellation of Cancer is also home to a fainter star cluster known as M67. This is much fainter than the Beehive and needs at least 70mm binoculars to see it from suburban skies. Being smaller than the Beehive, I also prefer to use a telescope to see it.

Further Reading

This guide to viewing the Beehive Cluster through binoculars is part of a series of biocular astonomy articles by Philip Pugh:

Guide to Choosing the Best Binoculars for Astronomy
Guide to Using Binoculars for Astronomy by Philip Pugh
Best 10x50 Binoculars for Astronomy

About Philip Pugh:

Philip describes himself as an “uninteresting person who does interesting things”. He had his first magazine article published in 1980 and has published four books in Patrick Moore’s “Practical Astronomy” series including those shown below.

Like nearly all writers, he has a “day job” and has spent most of his working life as a trainer or technical author. These days, astronomy is his only active interest outside of work and family. He is best known for his interest in the Sun and one of his many activities is to monitor activity using binoculars (with suitable filters). He is also a keen photographer and takes quality Astro photographs using mostly inexpensive equipment.

Share

The post The Beehive Cluster With Binoculars – Astronomy Series appeared first on Best Binocular Reviews.

Best Opticron 10x50 Binoculars for Astronomy & General Use

$
0
0
Opticron SR.GA 10x50 binoculars

Opticron SR.GA 10x50 binoculars

In this guide, I take a look at the best Opticron 10x50 Binoculars for Astronomy as well as more general uses like birding, hunting and wildlife observation. I include some brief product reviews based on their features and specifications and where to buy them to get the best deals. Models include the Opticron 10x50 Adventurer, Opticron 10x50 Imagic & Opticron SR.GA 10x50mm Binoculars.

I was recently asked by a BBR reader which binoculars from Opticron did I recommend for wide angle Astronomy as their main use, but which could also be suitable as an occasional general use instrument for mostly for observing wildlife down here on terra firma.

10x50 Binoculars for Astronomy

Configuration
Whilst there are a number of combinations you could opt for, I chose a 10x50 as it offers a good balance between light gathering ability, field of view, image detail (magnification) and is a size and power that be fairly easily handheld when looking at the stars as well as for general uses like hunting and wildlife observation here on land.

Prism Type
Whilst I can think of no “smoking gun” type of a reason why you can’t use a roof prism binocular for astronomy (indeed I use mine all the time), it just happens to be that most binoculars that are specifically designed for astronomers are of the porro prism variety.

I think this is partly down to the fact that you get a slightly better stereoscopic image (especially at longer distances) and Porro prisms do not require fancy mirror coatings on them to achieve total internal reflection and thus at the lower price ranges porros often have a higher reflectivity than roof prism binos, which at night is more important than ever.

Whatever the case and whilst Opticron do make a number of 10x50 roof prism binoculars, I decided that as the main focus in this instance is on stargazing, I would concentrate on the three 10x50 Porro prism binoculars that Opticron currently have in their stable:

Opticron SR.GA 10x50 Binoculars Review

Opticron SR.GA 10x50 binocularsThe highest specification option is the Opticron SR.GA 10x50 binocular and which I think is idea, however they can be a little difficult to track down, although as you can see below not impossible and there are some great deals to be had on these.

Main Features

  • Made in Japan
  • “Combination” Fully Multi-Coated Optics
  • Aluminium Alloy & Polycarbonate Chassis
  • Tripod Adaptable
  • Fold-Down Eyecups
  • 30 Year Guarantee

The Anti-reflection coatings used on these are interesting in that Opticron states that they apply different types of coating materials one at a time to each of the separate optical components within the pathway. Whilst this process does cost more than the multi-coatings used on most binoculars, they say that it is worth it as it produces a noticeable improvement to the color contrast.

Specifications

  • Field of View @ 1000 yards: 261ft
  • Field of View @ 1000 meters: 87m
  • Angle of View: 4.99°
  • Close Focus: 7.5 meters
  • Eye Relief: 19mm
  • Weight: 820g
  • Dimensions: 17.4cm x 17.5cm

Price & Where to Buy
US: At the time of writing, it seems only the 8x42 version of these Opticron SR.GA Binoculars is available in the US – not sure why, but it is worth checking the link below as this could change.

In the UK have an MSRP of £249.00 and currently retail for around £229.00 in the UK, although I managed to find them on offer for only £99.00 at here at First Light Optics, or you can check and compare the price with other retailers below.

USA: Prices & Where to Buy

UK: Prices & Where to Buy

Opticron 10x50 Imagic Binoculars Review

Opticron 10x50 Imagic TGA WP Porro Prism binocularsNext in line are Opticron’s 10x50 Imagic TGA WP Porro Prism binoculars that are far more readily available both in Europe and North America and whilst their MSRP price is less than the SR.GA above, they look to be superior in most areas:

Main Features

  • Sealed Chassis: Water & Fogproof (Nitrogen filled)
  • “Combination” Fully Multi-Coated Optics
  • BaK-4 Glass used on the Prisms
  • Aluminium Alloy & Polycarbonate Chassis
  • Tripod Adaptable
  • Twist-Up Eyecups
  • 30 Year Guarantee in Europe, Limited Lifetime Warranty (North America)

Actually, in more than a few areas, these are actually superior to the SR.GA – they are water and fogproof and they have twist-up multi-position eyecups, which can be really important if you wear eyeglasses.

Fully multi-coated, they use the same system of adding different types of anti-reflection coatings to these optics.

Specifications

  • Field of View @ 1000 yards: 279ft
  • Field of View @ 1000 meters: 93meters
  • Angle of View: 5.33°
  • Close Focus: 4.5 meters
  • Eye Relief: 19.5mm
  • Weight: 834g / 29.1oz
  • Dimensions: 17.3cm x 191.cm / 6.8in x 7.5in

In terms of their specifications, whilst they are ever so slightly heavier and larger, they have a wider FOV, more eye-relief and a closer minimum focus than the SR.GA.

Price & Where to Buy
In the US these have a manufacturer MSRP of $289 but are retailing for $249 at the time I checked.

In the UK RRP is £179.00 but sell online for around £129.00:

USA: Prices & Where to Buy

UK: Prices & Where to Buy

Opticron 10x50 Adventurer Binoculars Review

Opticron 10x50 Adventurer BinocularsAvailable in a wide variety of configurations, the Adventurer T WP is Opticron’s low cost offering. However as the use good quality porro prisms and fully multi-coated lenses, these will probably outperform most similar priced roof prism 10x50 binoculars in terms of image brightness and quality, so should most certainly not be discounted if you are on a budget:

Main Features

  • Fully Multi-Coated Optics
  • BaK-4 Porro Prisms
  • Aluminium Chassis
  • Tripod Adaptable
  • Fold-Down Eyecups
  • 2 Year Guarantee in Europe, 1 Year Warranty (North America)

Whilst Fully multi-coated (which is very good at this price range), they don’t use the same higher spec anti-reflection coatings of the two more expensive models above and these ar not sealed and thus neither water nor fog proof. Which if you use them out in the field in wet conditions could be an important factor to consider.

Specifications

  • Field of View @ 1000 yards: 315ft
  • Field of View @ 1000 meters: 105meters
  • Angle of View: 6°
  • Close Focus: 7 meters
  • Eye Relief: 18mm
  • Weight: 759g / 29.1oz
  • Dimensions: 16.9cm x 190.cm / 6.7in x 7.5in

These have the widest view of the three Opticron 10x50 Binoculars I have reviewed on the page and whilst not quite as good, the eye-relief should still be enough even for eye-glass wearers.

Price & Where to Buy
In the US, the Opticron 10x50 Adventurer Binoculars are MSRP listed at $139 but have a retail value of $79 when I last checked:

The UK RRP is £89.00 and are selling for about £79.00:

USA: Prices & Where to Buy

UK: Prices & Where to Buy

Conclusion

Considering the specifications and components, the best choice is the Opticron 10x50 Imagic Binoculars. However, whilst I still think they are good value, they are also the most expensive option.

If you can find the Opticron SR.GA 10x50 binoculars on a deal as I did at First Light Optics, then at this reduced price, these do look like good value and will most probably deliver the best view. However as they are not sealed, they may not be the best choice for the outdoors.

At under $80 / £80, the Opticron 10x50 Adventurer binoculars really do look like a good choice if you are on a tight budget and cant get the SR.GA deal that I mentioned above. If the choice is between these and a similarly priced roof prism, these will probably be the way to go.

Further Reading

Share

The post Best Opticron 10x50 Binoculars for Astronomy & General Use appeared first on Best Binocular Reviews.

Leica Noctivid Binoculars Review

$
0
0
Leica Noctivid 10x42 Binoculars

Leica Noctivid 10x42 Binoculars

Scope of the Review
In this guide to the Leica Noctivid binoculars, I will review the most important features, components, & specifications of both the 8x42 & 10x42 Noctivid models. From there we take a look at which model is the ideal choice for a number of uses and your specific needs, including birding, hunting, other general uses. Then lastly we will take a look at where you can buy a pair in order to get the best deal.

Introduction

Made in Germany, these Leica Binoculars are aimed at the very top end of the market and at users looking for quality above all else. Indeed Leica themselves describe the Noctivid as probably the best binoculars that they have ever made and whilst I know that this is “marketing talk”, it still speaks volumes as to where the company places them amongst all the other great instruments that they have produced over the years.

So are they as good as they say and if so, what makes them so special? Well, let’s take a look at them a lot more closely:

Outer & Structural Features

I think first off it is important to mention that they have an open-bridge body design, which if I am not mistaken are the only ones to have this within the entire Leica stable. Whilst most certainly not always the case, this can make for a more lightweight body, but the main advantage is that the open area between the two hinges provides a very secure place to hold onto the instrument. This is especially true when you are grasping them in one hand, which is something that I often prefer when traversing difficult terrain, rather than have my binoculars swinging from the strap around my neck where they could easily slam against a rock or tree for example.

Rubber Armor
As with just about any decent modern instrument, the Leica Noctivid binoculars have a rubber armor exterior which along with protection, also improves handling comfort and grip, so no surprises here. Although you can get these in either black or an olive green color depending on your preference.

Magnesium Chassis
These instruments have a magnesium alloy chassis, which is good to know. I say this because many lesser products will now have a polycarbonate one to save costs, which are also a little more lightweight, but magnesium is generally considered to be more robust and is less affected by temperature. This can be important because as the housing on a binocular expands and contracts due to temperature, this tiny movement has been known to also affect the optics and pull things fractionally out of alignment.

Fully-Sealed
Leica highlights the fact that not only are their Noctivid binoculars waterproof but are actually fully submersible to a depth of 16.5ft (5m). Whilst I would not recommend testing this by taking them for a swim, it is comforting to know and means you can be completely confident whilst using them in the wettest of weather conditions.

Remember that a fully sealed binocular will also prevent dust from entering the system in dry conditions and when in storage, which for many is more important than the waterproofing aspect.

Nitrogen Filled
At the factory, Leica replaces the air within the chassis with Nitrogen gas. This is a completely moisturless and thus prevents the glass surfaces on the inside from fogging up.

The focus wheel is centrally positioned and has an integrated and lockable diopter adjust incorporated into it. These binoculars also feature twist-up eyecups that have 4 fixed click stop positions.

Cut Away image of the Leica Noctivid Binoculars

Cut Away image of the Leica Noctivid Binoculars

Optical Features

Leica is a little coy when it comes to describing their optics in any great detail, however, though some research and a little deduction, below are the main points that I have been able to uncover:

Fully Multi-Coated
Frankly, I would have been shocked at this price to discover anything less, but just to confirm that ALL glass surfaces throughout the optical pathway have multiple layers of a material that has anti-reflection properties. This ensures that as much light as possible is captured and then correctly transferred through each lens and thus really helps to produce an image that is both brighter and of a higher quality.

Schott High Transmission Glass Prisms
I think it is important to highlight the fact that these binoculars use roof prisms with glass made by SCHOTT because they are considered by many to make the very best.

Prism Coatings
These roof prisms are then coated with a chemical (P40) that prevents the phenomenon of phase shift from occurring and they also have a mirror coating added to them to boost the degree of transmission. Leica calls this their HighLux-System (HLS), but do not go into detail. nor do they state the level of transmission. However my guess it will be their version of a dielectric coating, which have the highest levels and which is what I would expect to find in this price range.

Exterior Lens Coatings
The outer lens surfaces are treated with a really hard anti-scratch material for protection and then Leica also add their now iconic AquaDura coatings which are both aquaphobic and repel dirt making them stay cleaner for longer and require less pressure when you do need to clean them.

Specifications

Model Leica Noctivid 8x42 Leica Noctivid 10x42
Model No. 40 384 40 385
Field of View (ft.@1000yds / m@1000m) 443/135 376/112
Angle of view 7.7° 6.4°
Close Focus (ft. / m) 6.2/1.8 6.2/1.8
Exit Pupil (mm) 5.2 4.2
Eye Relief (mm) 19 19
Weight (oz. / g) 30.3/860
Dimensions: 4.88 x 5.91 x 2.68 in / 12.4 x 15 x 6.8 cm
IPD 56 – 74 mm
Diopter compensation ± 4 diopters

Wide View
With their extremely wide field of view, it is probably the 8x42 Leica Noctivid binocular that impresses me the most. However for a 10x binocular the view on the 10x42 Noctivid is also impressive.

Close Focus
Both have a good minimum focus distance and thus ideal for those who also like to view objects/animals/birds/insects etc from close range.

Eye-relief is also very good, making these a good choice should you need or want to wear glasses whilst looking through your instrument.

Ideal Uses

There is a reason why the 8x42 and 10x42 configurations are the ones most commonly produced by manufacturers and that is their particular qualities make them suitable for a very wide range of uses and covers most of the mainstream uses and interests. So taking into account the differences that the 8x and 10x powers make to the image detail (effective range), the field of view and their performance in low light conditions, we can make a better decision as to which one would be the best choice in some of these areas:

Bird Watching

The Leica Noctivid 8x42 Binoculars will be in most cases the ideal option for most general types of birding.

This is because:

  • The wider field of view makes it easier to quickly locate and then follow fast moving and often small birds (especially true at close range)
  • The larger exit-pupil and thus better low light performance is important in places like thick forests or at sunrise/sunset when the available light is not ideal and when many birds are at their most active

Obviously, if most of your birding is at the coast, or in fields where light is good and the distance to your birds is greater and where birds are usually larger and more predictable in their movements, then the 10x42 Noctivid would probably be the better choice.

Hunting

In wide open areas and where distances to the subject are a little longer, the Leica Noctivid 10x42 binocular is the best option. However as with birding, if you hunt in more confined spaces like forests where the lack of light can also be a problem then you may be better with the 8x42 Noctivid.

Leica Noctivid BinocularsCost & Where to Buy

These Leica Noctivid binoculars or not cheap. However as with many things and especially with optics and binoculars in particular, if you want the very best, without any compromises, you do need to pay for it.

Although if you do look around, it is possible to get a better deal and at times this can result in some substantial savings.

For current prices of these Leica binoculars listed on a number of internet retailers in your country (Included USA, Canada, UK, Germany, France, Spain, Australia and India), please follow the link below:

Buy & Compare Prices: Leica Noctivid Binoculars

Further Reading

Share

The post Leica Noctivid Binoculars Review appeared first on Best Binocular Reviews.

Best 7x50 Binoculars for Astronomy

$
0
0

Because the planets, stars, comets and even the moon are so far away from us, many people logically assume that you need a very high magnification binocular for astronomy and indeed giant high powered binoculars like a 15x70 or even a 25x100 are important for and commonly used for astronomy.

However, as well as these, the combination of a modest 7x power with the reasonably large, but not giant 50mm objectives is also one of the most frequently used setups for observing the night sky using binoculars.

So why is this?

In this article, I explore and explain the reasons why the 7x50 configuration is so popular with astronomers and then also take a look at some of the best 7x50 binoculars for astronomy currently on the market:

Why 7x50 Binoculars for Astronomy

It is true that the more magnification you have, the more image detail you can potentially see. Thus in regards to astronomy, you can see deeper into space to reveal more objects or view more details on the surface of the moon for example.

However, increasing the magnification also brings with it a number of drawbacks and so as with many things in life, you have to make some choices and compromises depending on your needs and exactly what you want to get from your instrument.

Field of View
As you increase the power or “zoom in”, the width (and height) of your overall view decreases. This is fine if you want to observe the finer details on the surface of the moon. Although, a narrow field of view makes it harder to locate objects and at very high powers it can be difficult to locate the object you wish to view. So at high powers, it can be hard to locate a particular star or planet because you lose all your reference points around it.

So for example, if you are looking for The Pleiades (Seven Sisters) and you know that to find them, you need to look for the constellation of Taurus this is fine and not too difficult with just your eyes. However, with a very high powered instrument, you will not be able to see the whole of Taurus and thus you lose your reference point making the Seven Sisters much harder to locate.

This is one of the main reasons why many spotting scopes have a variable magnification eyepiece as you can start in a low power setting and use it to find and then lock onto the object you wish to observe and then zoom in to get more detail.

However, because of the complications of viewing through two eye-pieces at once, in most cases, “Zoom Binoculars” are not really recommended.

So a low power like that on a 7x50 binocular gives you a wide view, making it much easier to scan the night skies and find particular points of interest. The wider view also means you can view entire constellations or star clusters in their entirety without the need to pan about.

Exit Pupil & Image Brightness
The exit pupil diameter or the size of the shaft of light exiting the eyepiece is critical in determining how bright an image you will see, especially in low light situations when your eye’s pupils are dilated and thus is incredibly important when considering what binoculars to get for stargazing.

The large 7.1mm exitpupil created by a 7x50 binocular makes it a good choice for use in low light or even at night

The exit pupil size is directly related to both the magnification and the size of the objective lenses.

So a 7x50 binocular has a 7.1mm exit pupil (50÷7). This is large enough to provide your eyes with enough light even when the pupils are fully dilated.

However, let’s say for example we increase the magnification to 12x and keep the objective lenses the same size. The exit pupil or shaft of light exiting the binocular would now only be 4.2mm (50÷12), which is much smaller and far less than ideal in low light scenarios.

Size & Weight
To increase the exit pupil in the example above, we could, of course, increase the objective lens size. Which is exactly what many high powered astronomy binoculars do. So popular higher powered astro binoculars include configurations like 10x50, 20x70 or even 25x100. However all of these have smaller exit pupils than the 7x50 configuration and thus whilst you get more detail, the image is probably not going to seem quite as bright to most people.

Increasing lens sizes not only increases the cost, but also the size and weight of the binocular. This is fine if you don’t mind setting up your binocular with a tripod. However, should you want a binocular for stargazing using just your hands and one that you can quickly take out and carry anywhere, then the 50mm size provides a good compromise between portability and light gathering ability.

Image Shake
Lastly, there is the problem of keeping the view still. No matter how powerful the magnification you have, you will miss all the detail in it if you cant stop the view from shaking about. So, in order to view more detail, you need a shake-free image.

The problem here is that the magnification of the image also magnifies any movement, so the higher the power, the harder it is to keep the view still. So as well as taking the weight off your arms, this is the other reason why you need a tripod when using high powered/giant binoculars for astronomy.

So here once again, the 7x50 setup makes it much easier to keep a steady view and thus perfect for use in the hands.

Ideal Uses

So taking into account their particular strengths, a 7x50 binocular makes an ideal, no hassle, take with you anywhere (like on a camping trip) binocular that is quick and easy to use without having to lug about or set up a tripod. It is also great for scanning the skies looking for a particular cluster or constellation.

At home, I also like to use my 7x50 in combination with either a giant high powered binocular or my telescope that I have set up on the tripod next to me.

Multi-Purpose Instrument
The other advantage of a 7x50 is that the combination of a very wide view and bright optics also makes a great low light general use, wildlife and particular bird watching binocular.

So long as you think about waterproofing, this setup is also ideal for marine use. Once again, the lower power once again makes it easier to keep the image still on the unsteady platform of a boat/yacht on the water and is great for scanning the horizon.

Best 7x50 Binoculars for Astronomy

So now that we have discovered why 7x50’s are in some case the best binoculars for stargazing, let’s take a look at some of the options out there in a range of price categories:

Cheap 7x50 Astronomy Binoculars – Under $50 / £50

Whilst better quality instruments with their improved optics and coatings will most certainly offer you a higher quality and brighter view, if you are just getting started with binocular astronomy, or just want a low-cost backup to take along anywhere or use next to your scope or high power device then these are worth taking a closer look at:

Celestron Cometron 7x50 Binoculars

Celestron Cometron 7x50 BinocularsThese very low cost binoculars from Celestron offer you a basic, but good starting point as they have most of the important bases covered and a reasonably wide field of view:

Main Features

  • Aluminum housing
  • BK7 porro prisms
  • Multi-coated optics
  • Fold-down eyecups
  • Tripod-adaptable
  • Field of view: 357ft @1000 yds / 119m @ 1000m

What’s Missing
Understandably at this very low cost, you can’t expect to find all the features and components used on higher end products. So what are the main things that are missing?

Not Fully Multi-Coated – whilst the optics are Multi-Coated, they are not Fully Multi-Coated. This means that it is probably only the outer objective and eyepiece lens surfaces that have been treated with an anti-reflection material. This is good, but they will not have the same level of light transmission as those that have all the elements throughout the optical pathway treated. The result will be that the image they produce is a little lower quality and less bright.

Prism Glass Glass – These use the cheaper BK-7 prism glass, whereas higher end binoculars will use better quality glass like BaK-4 that has a lower bubble count, fewer imperfections and thus generally delivers a higher quality image.

Not Sealed – This Celestron Cometron binocular is neither water nor fogproof, so I would not recommend it for Marine use. Also, they may not be ideal if you want to take them camping and use then for general uses and birding. However, if you keep them at home, or safe and out of the rain and away from dust they will be fine.

Eye-Relief – at 13mm the eye-relief is fine, however, should you wear eyeglasses whilst using your binoculars, then these would probably not be the ideal choice for you.

Prices & Where to Buy
A much cheaper alternative to the high-end Echelon range and less expensive than the Skymaster series, these will set you back around $35 to $90 / £45 to £60. To compare the latest prices in your country, follow the link below:

Prices & Where to Buy Celestron Cometron Binoculars

Low Cost 7x50 Binoculars – approx $100 / £90

At this price range, (especially with Porro prism binoculars), you can get a good performance to price ratio if you know where to look! Here is also where I recommend you look if you are on a tight budget. Indeed if you can afford it, you are usually better off with these than the very cheapest options (under $50) above as they offer some important improvements that will make your experience far more enjoyable:

Nikon Aculon A211 7x50 Binoculars

Nikon Aculon 7x50 BinocularsThese 7x50 Nikon binoculars are very popular amongst the astronomy community and at this price, with a good field of view and decent quality features, it is easy to see why:

Main Features

  • Aluminum housing
  • Bak-4 porro prisms
  • Multi-coated optics
  • Twist-Up eyecups with 17.6mm of eye-relief
  • Tripod-adaptable
  • Field of view: 335 ft @1000 yds

Main Points

Not Fully Multi-Coated – Once again these are Multi-Coated, not Fully Multi-Coated, which is a little of a disappointment as it tells us that only some, not all lens surfaces have anti-reflection coatings. Thus compared to higher end optics, these will capture and transmit less light and thus produce a less bright image.

BaK-4 Prism Glass Glass – A definite improvement on the Celestron above is the fact that these have higher quality BaK-4 Porro prism glass.

Weather Resistant – Whilst not completely sealed, they are described as weatherproof. This should keep out light rain and dust. However, should you also require your 7x50 binoculars for marine use or often go out in the worst weather conditions, you may be better off with a fully o-ring sealed and thus fully waterproof instrument.

Eye-Relief – The 17.6mm of eye-relief is good and along with the improved twist-up eyecups makes them a solid choice for eyeglass wearers.

Prices & Where to Buy
At around $100 / £80, the 7x50 Aculon does look to offer very good value for money and is certainly one of my favorite choices at this low to mid price level. To compare the latest prices in your country, follow the link below:

Prices & Where to Buy Nikon Aculon 7x50 Binoculars

Mid Range 7x50 Binoculars – approx $150 / £150

Here you should be looking for a binocular that has fully multi-coated optics and which is completely waterproof and fog proof as well as having a number of other small improvements. Below is my current favorite option at this level:

Sightron 7x50 SII Binoculars

Sightron 7x50 SII BinocularsUnlike the Celestron or Nikons above, this is perhaps not a brand that everone would instantly recognise. However these are popular amongst the astonomy community and in my opinion and in terms of their features and componets deliver extremely good value for money:

Main Features

  • Bak-4 porro prisms
  • Fully Multi-coated optics
  • Waterproof
  • 18.1mm of eye-relief
  • Tripod-adaptable
  • Field of view: 372ft @1000 yds

Main Points

Wide View – with a viewing angle of 7.1° or to put it another way a view that is 372 feet wide at 1000 yards away, these 7x50 Sightron SII binoculars make it easier for you to scan the night sky, locate objects and study them without having to move the view about.

Fully Multi-Coated – Every lens surface throughout the entire optical pathway on these Sightron SII Binoculars has multiple layers of an anti-reflection material added to them. This is my experience dramatically and perceptibly improves image brightness and quality.

BaK-4 Prism Glass Glass – Good quality optical glass is used on the prisms, for a better and brighter view.

Waterproof – Completely sealed, this is a good choice for camping and even taking on your boat or yacht. The seals also prevent dust from entering the system.

Eye-Relief – 18.1mm of eye-relief is excellent and a good choice for those who wear glasses during observation.

Protection – With these, you also get the benefit of a comprehensive Lifetime Warranty from Sightron.

Prices & Where to Buy
Currently retailing for approximately $140 / £150, I really do feel that these offer one of the best performance to price ratio 7x50 binoculars on the market. Check the link below for where to buy in your country:

Prices & Where to Buy Sightron 7x50 Binoculars

High End 7x50 Binoculars – over $500 / £500

For those not wanting to compromise and who want the best views possible:

Fujinon 7x50 FMT Polaris Binoculars

Fujinon 7x50 FMT-SX Polaris BinocularsAs well as astronomy, these are ideal for boating, general use, wildlife and certainly birding applications.

The 7x50 Fujinon FMT Polaris has a fully-sealed aluminum chassis and comes with a traditional and dare I say it, classy looking pebbled external finish. Although you can also get a Polaris FMTR version (see image below) that has a rubber armor with tethered lens covers, should you wish. Indeed if you are planning on also using them as a marine binocular, this will probably be the better option.

Rather than a focus wheel, these binoculars are fixed focus / focus free binoculars and thus once calibrated to your vision using each of the eye-pieces, you no longer have to alter the focus for any objects from medium range right to infinity and thus are particularly ideal for stargazing and boating.

Fujinon 7x50 FMT-SX Polaris BinocularsMain Features

  • Individual Eyepiece (Fixed Focus System)
  • Field flattener lenses
  • Bak-4 porro prisms
  • Fully Multi-coated optics (95% light transmission)
  • Waterproof & Fogproof (Nitrogen Purged)
  • 23mm of eye-relief
  • Tripod-adaptable
  • Field of view: 393ft @ 1000yds

Main Points

Field flattener Lenses – the fact that Fujinon has incorporated field-flattener lenses into the Polaris series is a definite indication of their very high quality. Only found on very high-end instruments, these eliminate many field aberrations that most leave uncorrected, with the result being much less distortion for a sharper, clearer images right to the edges of the view.

Very Wide View – At 393 feet wide at 1000 yards away, these Fujinon Polaris binoculars have a viewing angle of 7.5° which ranks them up there with the very best 7x50 binoculars.

As I have mentioned earlier, a wide view has many advantages, especially for astronomy making it easier to find objects and scan the skies. It is also a feature that many birders look for as it makes locating and then following fast moving birds at closer ranges much easier.

Fully Multi-Coated – Fujinon have added their “special EBC coating” to every single lens and prism surface throughout the whole optical system. They claim that this enables 95% light transmission across the full visible spectrum and thus are up to 15% brighter than many other high-quality binoculars.

Water & Fog proof – Fully O-ring sealed these binoculars are 100% waterproof. The interior is also filled with moistureless Nitrogen gas which prevents the internal optics from misting up which can easily occur when you have a rapid temperature change. So for example when moving from a warm house out into cold outdoors.

Eye-Relief – with these Fujinon binoculars you have a massive 23mm of eye relief. This gives you plenty of room to maneuver behind the ocular lenses to ensure that you can always get the full image without any black rings forming on the edges. This also makes them the ideal choice for eyeglass users.

Protection – For piece of mind and a demonstration on the faith that they have in their product, you get a fully covered lifetime Warranty from Fujinon.

Prices & Where to Buy
Depending on where you buy and which exact model you choose, these 7x50 Fujinon Polaris binoculars cost around $650 / £650, so by no means cheap, but as they often say: In life, you get what you pay for!

Prices & Where to Buy Fujinon 7x50 FMT Polaris Binoculars

Share

The post Best 7x50 Binoculars for Astronomy appeared first on Best Binocular Reviews.

Expensive vs Cheap Binoculars

$
0
0

comparing cheap vs expensive binoculars

This weeks question was asked by someone who I spoke to on my live chat. I thought that my answer would be of use to others and so have published it here:

Have A Question For Me?Question:

I am a binocular novice looking to buy a good pair of binoculars, the problem is I don’t know what my budget should be!

So please can you explain to me what the difference is between a cheap pair of binoculars and an expensive pair and how this affects the way they work.


Answer

Here on BBR I divide the binos that I review into 6 main price categories ranging from very cheap binoculars that cost less than $50/£50 to the very best premium binoculars that cost more than $1200/£1200.

To the average person, almost all of them look fairly similar and so it can be hard to understand why some cost so much more than others. To help with this take a look at what features you can get at different price ranges and what the main differences are:

  Very Cheap Low Cost Mid – High Priced High End & Premium
Approx Cost Under $50/£50 $50 – $130 / £50 – £130 $130 – $500 / £130 – £500 Over $500 / £500
Prism Glass Bk-7 Bak-4 Bak-4 Bak-4 or better like SK15
High-Reflective Prism Coatings None or maybe Aluminum Mirror Coating Aluminum or Enhanced Aluminium Mirror Coating Silver Mirror Coating to Dielectric Coating Mostly Dielectric Coating
Phase Correction Coatings (Roof Prism) Never Not Often Yes, but not always Yes
Lens Design Usually Achromatic Usually Achromatic Usually Achromatic Achromatic or Apochromatic
Anti-Reflection Lens Coatings None or just Coated Coated to Multi-Coated Multi-Coated to Fully Multi-Coated Fully Multi-Coated
Oil & Water Repellent Lens Coatings Never Never A Few Quite Often
Ant-Scratch Lens Coatings Never Never A Few Quite Often
ED Glass Elements Never No Sometimes Most Often
Waterproof Almost Never Not Always Almost Always Yes
Fogproof Almost Never Not Always Almost Always Yes
Carry Bag Quality Poor Poor to Good Good to Excellent Mostly Excellent
Neck Strap Quality Poor Poor to Good Good to Excellent Mostly Excellent
Typical Build Quality Poor Poor to Good Good to Excellent Excellent
Toughness & Durability Most Often Bad Bad to Good Good to Excellent Usually Excellent
Typical Image Quality Bad to OK OK to Good Good to Excellent Excellent
Typical Value for Money Mostly Bad Bad to Good Good to Excellent Poor to Excellent


Very Cheap Binoculars

As you would expect very cheap binoculars are also manufactured in such a way and in locations where production costs are kept to a minimum. They also use as few expensive "bits" as possible to keep the price down. So in other words very inexpensive pairs are as basic as you can get and in the worst cases little better than toys.

The quality of the extras like the carry bag, neck strap and lens covers on cheap bins is also usually far inferior to that on more expensivr pairs.

Beware of Gimmicks
The binoculars will often use a "feature" to try and sell the binoculars. A good example are ruby coatings on the lenses that were made popular in movies like "The Terminator" and thus look cool. These coatings are supposed to take out red from the spectrum and thus look like they have eliminated color aberrations, but then without red, the image they produce looks unnatural and washed out.

Cheap Porro vs Roof Prism
If you are on a tight budget, in many cases you are probably better off choosing a porro prism binocular as apposed to a roof prism design (especially if size is not an issue). This is because the design of the porro prism means that they don’t require many of the expensive high-reflective and phase correction coatings needed on a roof prism to achieve the same quality of image.

Expensive Binoculars

On the other end of the scale, higher spec optics are built to exacting standards, by highly skilled people, using the latest technologies and only the finest quality materials and components.

All in the name
You are in some instances also paying a premium for the name and their history. This can be a double edged sword as on the one hand you are buying into a name that assures you a certain level of quality and workmanship. But on the other hand, you do have to pay for the privilege of joining their "club".

Best Value for Money

The best value for money binoculars are ones that are built well, contain as many of the best quality components and coatings as possible and produce a high quality image, but at the same time cost as little as possible.

Whilst there are exceptions, this generally means that cheap does not equate to good value as you do need to spend a certain amount of money to get more "bang for your buck" and very cheap bins don’t usually have enough quality components to produce a long lasting product or a good quality image.

On the other had, some very expensive binoculars use all the best bits and produce an incredible image, but charge a lot for their name. So whilst they may be the best binoculars, they are not always the best value for money.

I have found that for the most part, you can get a very good value binocular with most of the good bits, that will produce a good to very good image from around $250.

The binoculars below use coatings and components that are as good or better than the typical examples from the table above and so are in my opinion good value for money within their price bracket:

  Very Cheap Low Cost Mid – High Priced High End Premium
  Pentax UCF R 8x21 Binoculars Kowa 8x30 YF Binoculars Vanguard Spirit ED 10x42 Binoculars Snypex Knight D-ED 8x32 Binoculars Vortex 8x42 Razor HD Binoculars
  Pentax UCF R 8x21 Kowa 8x30 YF Vanguard Spirit ED 10x42 Snypex Knight D-ED 8x32 Vortex 8x42 Razor HD
Approx Cost Under $50/£50 $150 / £150 $200 / £200 $549 $1100
Prism Glass Bk-4 Bak-4 Bak-4 Bak-4 Bak-4
High Reflection Prism Coatings Not Needed Not Needed Silver Mirror Coating Dielectric Coating Dielectric Coating
Lens Design Think Achromatic Think Achromatic Achromatic Apochromatic (APO) Apochromatic (APO)
Phase Correction Coatings (Roof Prism) Not Needed Not Needed Yes Yes Yes
Anti-Reflection Lens Coatings Multi-Coated Fully Multi-Coated Fully Multi-Coated Fully Multi-Coated Fully Multi-Coated
Oil & Water Repellent Lens Coatings No No No Yes Yes
Ant-Scratch Lens Coatings No No No No Yes
ED Glass Elements No No Yes Yes Yes
Waterproof No Yes Yes Yes Yes
Fogproof No Yes Yes Yes Yes
Carry Bag Quality OK Good Very High – Excellent Excellent Excellent
Neck Strap Quality OK Good Very Good Excellent Excellent
Build Quality Good Good Very Good Excellent Excellent
Toughness & Durability OK Good Very Good Excellent Excellent
Image Quality OK Very Good Very Good Excellent Excellent
Value for Money OK Good Excellent Very Good – Excellent Very Good


For more examples, take a look at my guide to:

Other Alternatives

Vanguard Spirit XF 10x42 BinocularsLow Cost
For some more ideas, take a look my page on the best binoculars for under £200 ($200) which contains my selection of some of the best bins that I have reviewed within this price range.

On this page also find some full-sized bins, including the great value for money Vanguard Spirit XF 10x42 and the excellent Hawke Nature-Trek 8x42 Binoculars.

These and other full sized binos generally offer a better performance than a compact, but with the obvious trade-off being the extra size and weight you have to carry.

Mid – High Priced
Also take a look at my article on the Best ED Binoculars for under $350 / £350.

Snypex Knight D-ED 8x32 BinocularsHigh End
Winner of the award for the Best Safari & Travel Binocular in 2018, I have nothing but good things to say about the superb Snypex Knight D-ED 8x32. Highlights include a fully multi-coated optical system with an APO objective lens design with ED glass elements, phase corrected BaK-4 roof prisms with the very best dielectric mirror coatings added to them.

The body is as you would expect both water and fog proof and I really liked using the all metal focus wheel whilst tesiting them and the focus mechanism was both smooth and precise. So whilst not cheap, I do think that for a high end binocular, they offer really good value for money. Highly Recommended.

Swarovski CL Companion 8x30 BinocularsPremium
As well as the Vortex Razor listed above, I also highly recommend the 8x30 Swarovski CL Companion if you are looking for an extremely high quality semi-compact from one of the most respected names in optics.

At this level, and for a top European brand like Swarovski, you are always going to pay some sort of a premium, but I think these are offered at a reasonable cost when you consider the quality of workmanship, coatings and optical components that are used.

Have A Question For Me?Do you have a question?

If you are confused as to which binocular is right for you and your needs, or just what to know about a particular feature or aspect on a pair of bins, then I would love to try and answer it for you: ask your question here.

Share

The post Expensive vs Cheap Binoculars appeared first on Best Binocular Reviews.

Viewing all 313 articles
Browse latest View live